

Note: Before diving into this project, I highly recommend taking a moment to check out my last project [PROJECT: 🐳 Containerizing a Multi-Tier Java Web Application with Docker 🚀 ]It lays the foundation for the ideas and concepts discussed here and will greatly enhance your understanding of this content.
Kubernetes Setup for productions:
For this Project at first, We will setup our Kubernetes Master and Node:
-------------------Both Master & Worker Node --------------------
sudo apt update -y
sudo apt install docker.io -y

sudo systemctl start docker
sudo systemctl enable docker

sudo curl -fsSLo /usr/share/keyrings/kubernetes-archive-keyring.gpg https://packages.cloud.google.com/apt/doc/apt-key.gpg

echo "deb [signed-by=/usr/share/keyrings/kubernetes-archive-keyring.gpg] https://apt.kubernetes.io/ kubernetes-xenial main" | sudo tee /etc/apt/sources.list.d/kubernetes.list

sudo apt update -y
sudo apt install kubeadm=1.20.0-00 kubectl=1.20.0-00 kubelet=1.20.0-00 -y
-------------------------- Master Node ----------------------------
sudo su
kubeadm init

  mkdir -p $HOME/.kube
  sudo cp -i /etc/kubernetes/admin.conf $HOME/.kube/config
  sudo chown $(id -u):$(id -g) $HOME/.kube/config

kubectl apply -f https://github.com/weaveworks/weave/releases/download/v2.8.1/weave-daemonset-k8s.yaml

kubeadm token create --print-join-command
---------------------------- Worker Node ------------------------------
sudo su
kubeadm reset pre-flight checks
-----> Paste the Join command on worker node with `--v=5`

Scenario:
🚀 Containerized Web Application Stack: Our multi-tier web application stack has already been containerized, ensuring portability and scalability.
📦 V Profile Web Application: The V Profile web application, which we previously containerized and tested, is ready for production hosting.
⚙️ Running Containers for Production: The next step is to host the containerized web application stack in a production environment.
🌟 Orchestration and Management: We face the challenge of orchestrating and managing the deployment of our containerized web application stack.
💪 Leveraging Clusters: We will harness the power of clusters to distribute the workload, improve reliability, and optimize resource utilization.
🌈 Benefits of Cluster Deployment: Deploying our containerized web application stack on clusters allows for seamless scalability, fault tolerance, and high availability. 🚀⚙️🌟💪🌈 Picture of Efficiency: Together, we will create a robust and efficient production environment where our web application shines brightly.
Requirements:
🌟 High Availability: Ensure continuous operation by preventing container downtime and maintaining high availability on compute nodes.
⚙️ Fault Tolerance: Implement auto-healing mechanisms to address unresponsive containers and maintain system stability.
💪 Scalability: Enable convenient scaling of containers and compute resources to accommodate changing workload demands.
🔀 Platform Independence: Ensure compatibility across different platforms, allowing seamless deployment on local clouds, physical machines, and various environments such as development, QA, and production.
📦 Portability: Foster portability by enabling the easy movement of containers between different environments, ensuring flexibility and agility.
💻 Resource Flexibility: Provide the ability to dynamically allocate compute resources to containers, allowing efficient utilization and adaptability.
🚀 Convenience: Ensure that the deployment process is straightforward and convenient, allowing for hassle-free management and operation across different environments.
By meeting these requirements, we can achieve a robust and adaptable deployment strategy for our containerized web applications on clusters, empowering us to maintain high availability, fault tolerance, and scalability while promoting flexibility and ease of use

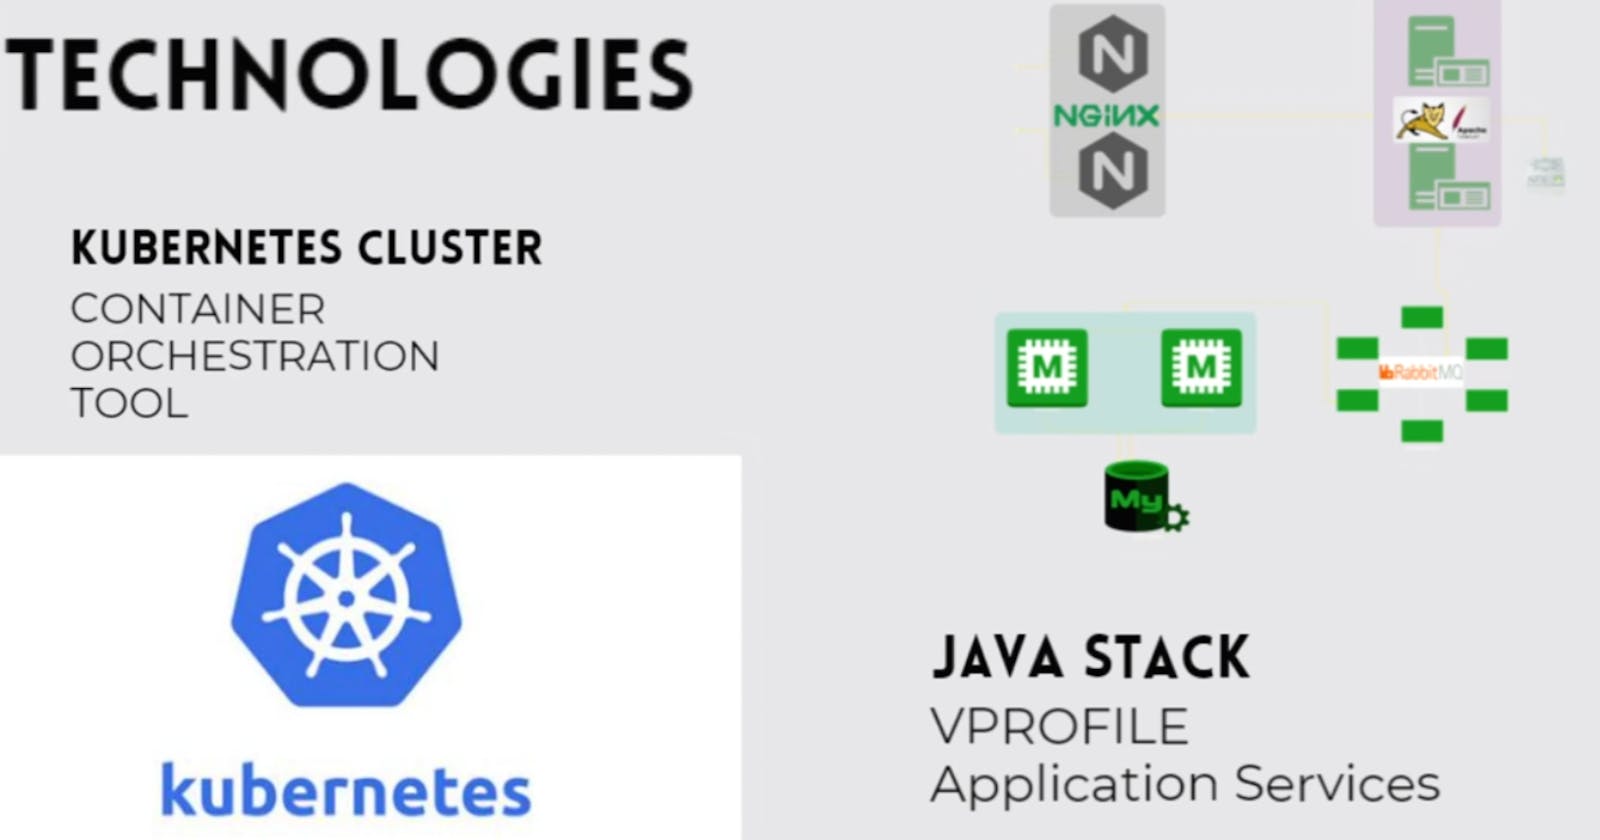
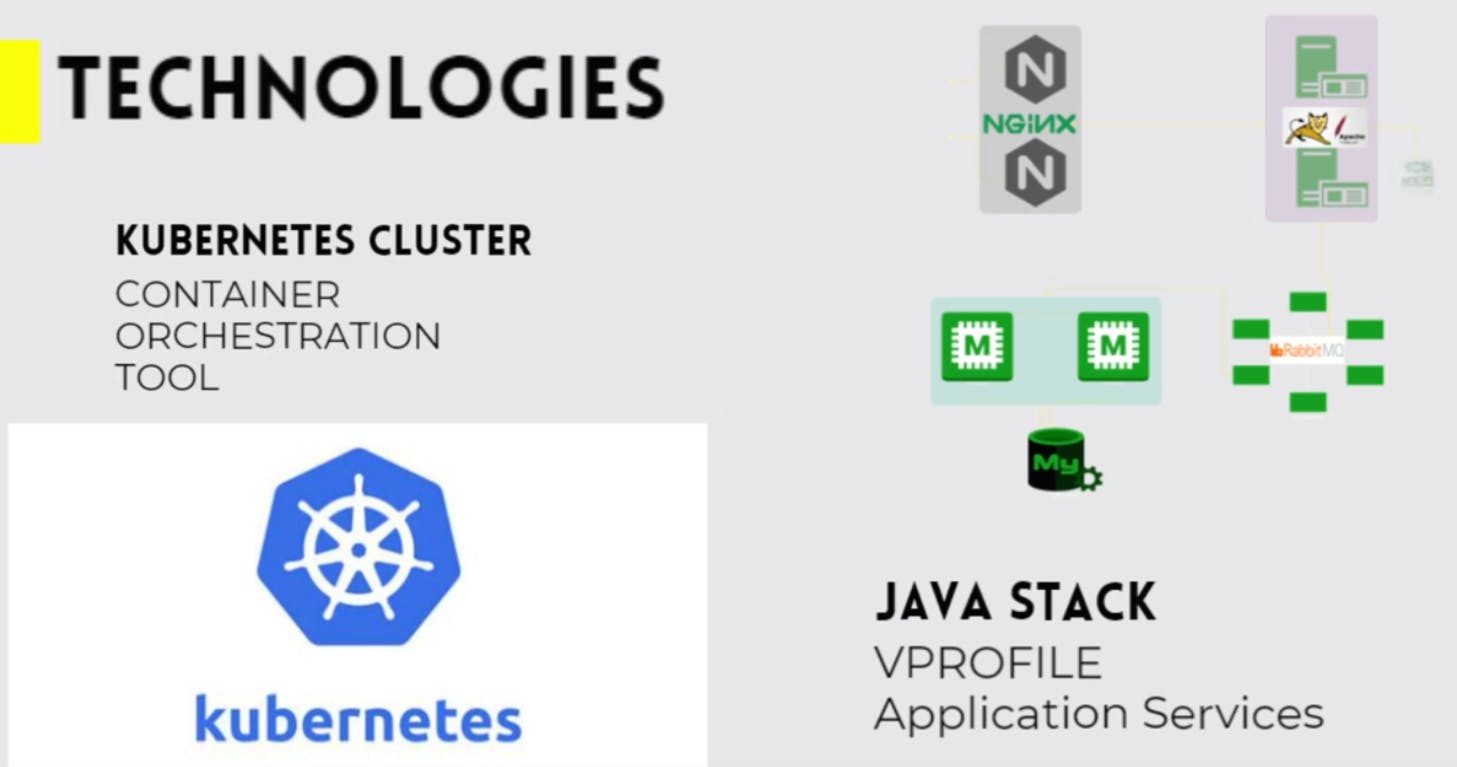
Technology:
Our Java V profile application which we have containerized and we're going to run it on the Kubernetes cluster for production. Let's see how we're going to do it.
Steps:
🚀 Set up the Kubernetes Cluster and Nodes: Prepare your Kubernetes cluster with multiple nodes for high availability and fault tolerance.
🚀 Containerized Application: Utilize the previously containerized V Profile application to deploy it on the Kubernetes cluster.
🚀 Coupon Disk Cluster and EBS Volume: Create a coupon disk cluster to manage storage requirements. Additionally, set up an EBS volume to store data persistently for the MySQL container in the V Profile application.
🚀 Label Nodes with Zone Names: Label the nodes in the cluster with their respective zone names to ensure that the DB pod runs on the same node or zone as the EBS volume.
🚀 Write Kubernetes Definition Files: Craft Kubernetes definition files specifying the deployment, service, secret, and volume configurations necessary for deploying the application on the Kubernetes cluster.
🚀 Create Objects on Kubernetes Cluster: Apply the Kubernetes definition files to create the required objects on the Kubernetes cluster. This includes deploying the V Profile application as a deployment, setting up networking services, managing secure configuration through secrets, and configuring volumes for persistent data storage.
By following these steps, you can successfully deploy the containerized V Profile application on the Kubernetes cluster, allowing for efficient management, scalability, and seamless operation of the application. 🚀
Volume Prerqs for DB POD:
First create a pv.yml file.
apiVersion: v1
kind: PersistentVolume
metadata:
  name: my-pv
spec:
  capacity:
    storage: 2Gi
  accessModes:
    - ReadWriteOnce
  persistentVolumeReclaimPolicy: Retain
  hostPath:
    path: "/tmp/data"
✨ This definition creates a persistent volume with a storage capacity of 2Gi. It supports the "ReadWriteOnce" access mode, allowing it to be mounted by a single node at a time. The persistentVolumeReclaimPolicy is set to "Retain," ensuring that the volume will not be automatically deleted when released. 🗂️ The volume is backed by a hostPath on the node, and the specified path is "/tmp/data".
Now create a claim for this
and apply both kubectl apply -f pv.yml and pvc.yml
apiVersion: v1
kind: PersistentVolumeClaim
metadata:
  name: my-pvc
spec:
  accessModes:
    - ReadWriteOnce
  resources:
    requests:
      storage: 2Gi
  volumeName: my-pv
This definition creates a PersistentVolumeClaim (PVC) named "my-pvc" with the following settings:
The access mode is set to "ReadWriteOnce," allowing it to be mounted by a single node at a time.
The PVC requests a storage capacity of 2Gi.
The PVC is associated with a specific PersistentVolume named "my-pv" using the
volume namefield.
Next, I will label the nodes with ap-northeast-3 accordingly. We need to make sure that we are running our DB pod in the same zone our EBS volume created. For this reason, we will create labels for our nodes

Kube secret for passwords
So let's write our first definition file which will be of creating a secret, so I'm gonna say file. We'll leave it as app-secret.yml
At first, encoded our db password:
echo -n "vprodbpass" | base64

echo -n "guest" | base64

apiVersion: v1
kind: Secret
metadata:
  name: app-secret
type: Opaque
data:
  db-pass: dnByb2RicGFzcw==
  rmq-pass: Z3Vlc3Q=

This definition creates a Secret named "app-secret" with the following settings:
The
typeis set to "Opaque" indicating that the Secret holds arbitrary key-value pairs.The Secret contains two key-value pairs:
Key: "db-pass" | Value: "dnByb2RicGFzcw==" (encoded value for "password").
Key: "rmq-pass" | Value: "Z3Vlc3Q=" (encoded value for "guest").
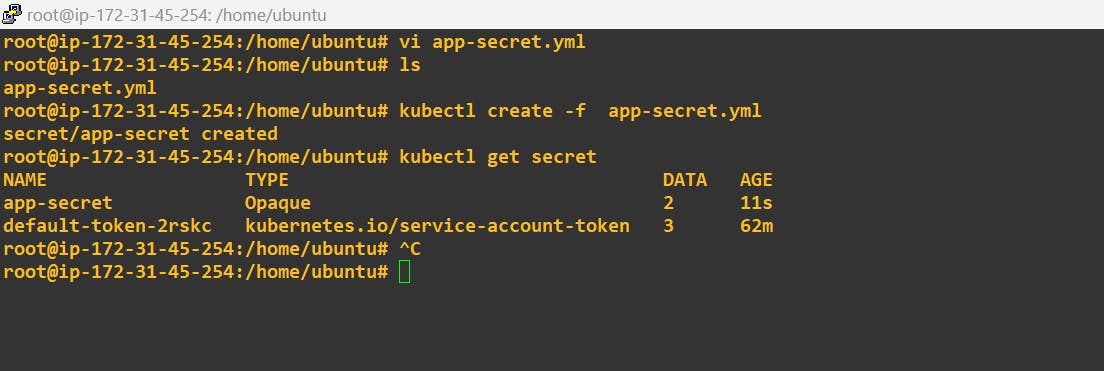
kubectl create -f app-secret.yml
DB Deployment Definition:
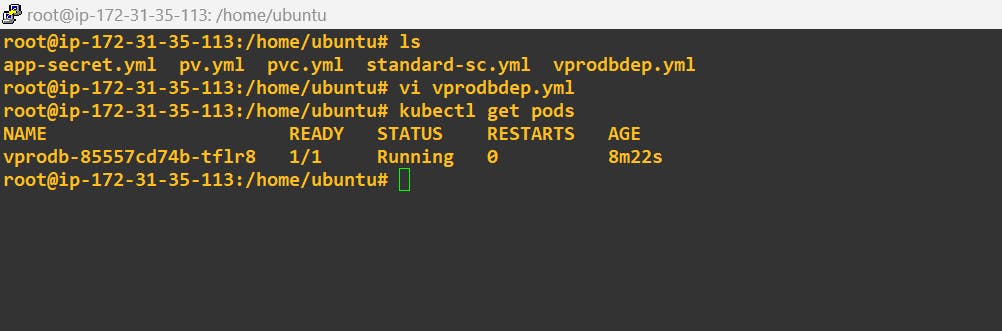
OK, now we'll write our db definition file.
apiVersion: apps/v1
kind: Deployment
metadata:
  name: vprodb
  labels:
    app: vprodb
spec:
  selector:
    matchLabels:
      app: vprodb
  replicas: 1
  template:
    metadata:
      labels:
        app: vprodb
    spec:
      containers:
      - name: vprodb
        image: vprofile/vprofiledb:V1
        args:
         - "--ignore-db-dir=lost+found"
        volumeMounts:
        - mountPath: /var/lib/mysql
          name: vpro-db-data
        ports:
        - name: vprodb-port
          containerPort: 3306
        env:
         - name: MYSQL_ROOT_PASSWORD
           valueFrom:
             secretKeyRef:
               name: app-secret
               key: db-pass
      volumes:
        - name: vpro-db-data
          persistentVolumeClaim:
            claimName: my-pvc
This visually enhanced Kubernetes definition file brings a touch of excitement to the "vprodb" Deployment:
The container within the pod is represented by a rocket icon 🚀, signifying its readiness for launch.
The image being used is indicated with a shining star icon 🌟, highlighting its significance.
Additional container arguments are represented by a gear icon ⚙️, symbolizing their role in configuring the container.
The port being exposed is marked with a globe icon 🌐, emphasizing its connectivity aspect.
The environment variable referencing the "db-pass" key from the "app-secret" Secret is accompanied by a padlock icon 🔒, representing its secure nature.
The volume and persistent volume claim are denoted by a disk icon 💾, emphasizing their role in data storage.
DB Service Definition
We have to create a service for this DB, so our. Application port can access it, so I'm going to create. We have not been exposed to the outside world which is going to only for the internal traffic.
apiVersion: v1
kind: Service
metadata:
  name: vprodb
spec:
  ports:
    - port: 3306
      targetPort: vprodb-port
      protocol: TCP
  selector:
    app: vprodb
  type: ClusterIP
This definition creates a Service named "vprodb" with the following settings:
The Service exposes port 3306 for TCP traffic.
The targetPort is set to "vprodb-port", which corresponds to the port defined in the Deployment.
The Service selects the pods with the label "app: vprodb" to direct the traffic.
The Service type is set to "ClusterIP", which provides a stable cluster-internal IP address for communication within the cluster.
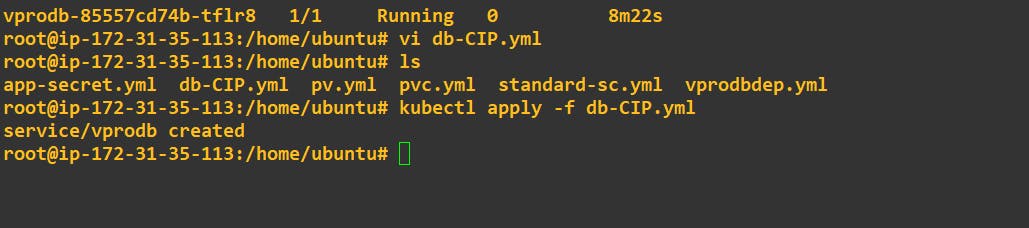
apply it
kubectl apply -f db-CIP.yml
Memcached Deployment & Service
OK, that's fine. Let's continue with our next. What definition file or deployment definition file is for Memcache
apiVersion: apps/v1
kind: Deployment
metadata:
  name: vpromc
  labels:
    app: vpromc
spec:
  selector:
    matchLabels:
      app: vpromc
  replicas: 1
  template:
    metadata:
      labels:
        app: vpromc
    spec:
      containers:
      - name: vpromc
        image: memcached
        ports:
        - name: vpromc-port
          containerPort: 11211
n this visually enhanced Kubernetes definition file, we bring a touch of excitement to the "promo" Deployment:
The container within the pod is represented by a rocket icon 🚀, symbolizing its readiness for launch.
The image being used is indicated with a shining star icon 🌟, highlighting its significance.
The port being exposed is marked with a globe icon 🌐, emphasizing its connectivity aspect.
apply it :
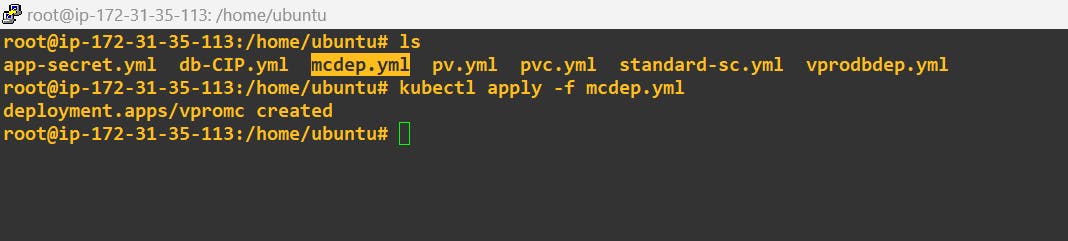
also CIPFile
apiVersion: v1
kind: Service
metadata:
  name: vprocache01
spec:
  ports:
  - port: 11211
    targetPort: vpromc-port
    protocol: TCP
  selector:
    app: vpromc
  type: ClusterIP
This definition creates a Service named "vprocache01" with the following settings:
The Service exposes port 11211 for TCP traffic.
The targetPort is set to "promo-port", which corresponds to the port defined in the Deployment.
The Service selects the pods with the label "app: vpromc" to direct the traffic.
The Service type is set to "ClusterIP", which provides a stable cluster-internal IP address for communication within the cluster.
apply it :

RabbitMQ Deployment & Service:
OK, next rabbit MQ.
apiVersion: apps/v1
kind: Deployment
metadata:
  name: vpromq01
  labels:
    app: vpromq01
spec:
  selector:
    matchLabels:
      app: vpromq01
  replicas: 1
  template:
    metadata:
      labels:
        app: vpromq01
    spec:
      containers:
      - name: vpromq01
        image: rabbitmq
        ports:
        - name: vpromq01-port
          containerPort: 15672
        env:
         - name: RABBITMQ_DEFAULT_PASS
           valueFrom:
             secretKeyRef:
               name: app-secret
               key: rmq-pass
         - name: RABBITMQ_DEFAULT_USER
           value: "guest"
apply :

apiVersion: v1
kind: Service
metadata:
  name: vpromq01
spec:
  ports:
  - port: 15672
    targetPort: vpromq01-port
    protocol: TCP
  selector:
    app: vpromq01
  type: ClusterIP

Tomcat Deployment, Service & Initcontainers:
Right now our main heroes tomcat vproapp-dep.yml and vproapp-src.yml
apiVersion: apps/v1
kind: Deployment
metadata:
  name: vproapp
  labels:
    app: vproapp
spec:
  replicas: 1
  selector:
    matchLabels:
      app: vproapp
  template:
    metadata:
      labels:
        app: vproapp
    spec:
      containers:
      - name: vproapp
        image: vprofile/vprofileapp:V1
        ports:
        - name: vproapp-port
          containerPort: 8080
      # initContainers:
      # - name: init-mydb
      #   image: busybox
      #   command: ['sh', '-c', 'until nslookup vprodb; do echo waiting for mydb; sleep 2; done;']
      # - name: init-memcache
      #   image: busybox
      #   command: ['sh', '-c', 'until nslookup vprocache01; do echo waiting for mydb; sleep 2; done;']
In this definition:
The Deployment is named "vproapp" with the corresponding label "app: vproapp".
It ensures one replica of the pod for the application.
The container within the pod is named "vproapp" and uses the "vprofile/vprofileapp:V1" image.
The container exposes port 8080 for the application.
The container is represented by a rocket icon 🚀, symbolizing its readiness for launch.
The image being used is indicated with a shining star icon 🌟, highlighting its significance.
The port being exposed is marked with a globe icon 🌐, emphasizing its connectivity aspect
apiVersion: v1
kind: Service
metadata:
  name: vproapp-service
spec:
  ports:
  - port: 80
    targetPort: vproapp-port
    protocol: TCP
  selector:
    app: vproapp
  type: LoadBalancer
This definition creates an attractive Service named "vproapp-service" with the following features:
The Service exposes port 80 for TCP traffic, opening the gateway for seamless communication 🌐.
The targetPort is set to "vproapp-port", ensuring a precise and direct connection to the desired application port 🎯.
The Service selection is based on the "app: vproapp" label, handpicking the pods associated with the vibrant "vproapp" application 🎈.
The Service type is set to "LoadBalancer", signifying its ability to balance the incoming traffic with grace and stability, like a skilful acrobat 🤹.
Now try to test all services:
kubectl get all
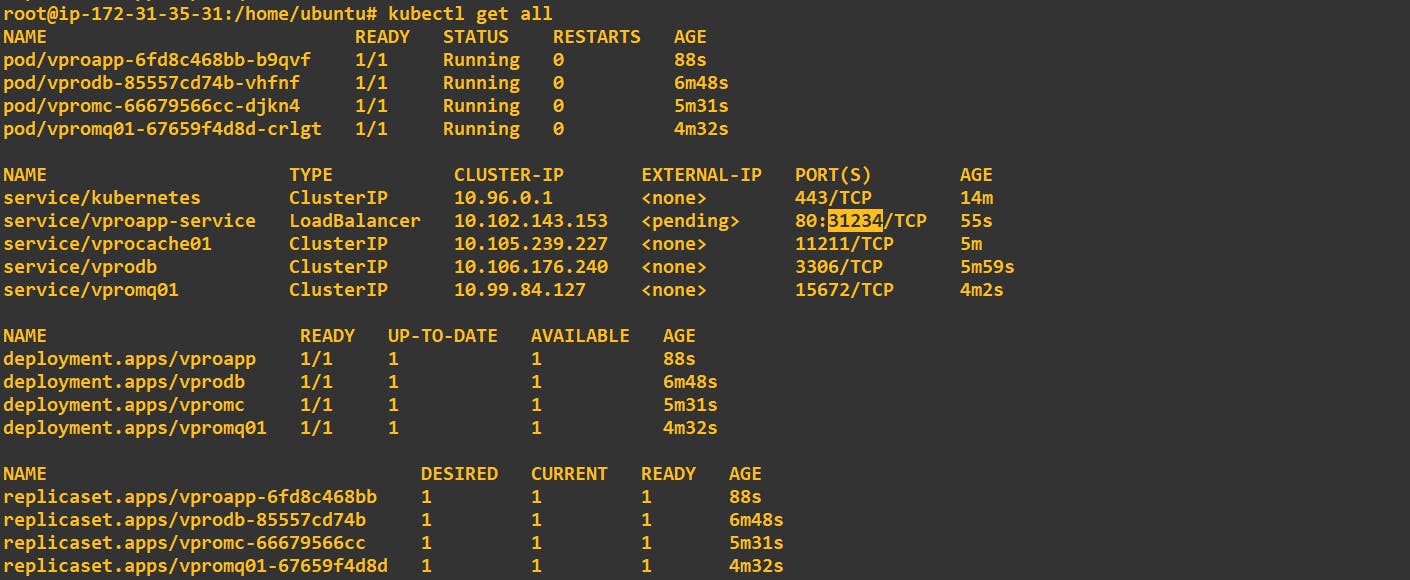
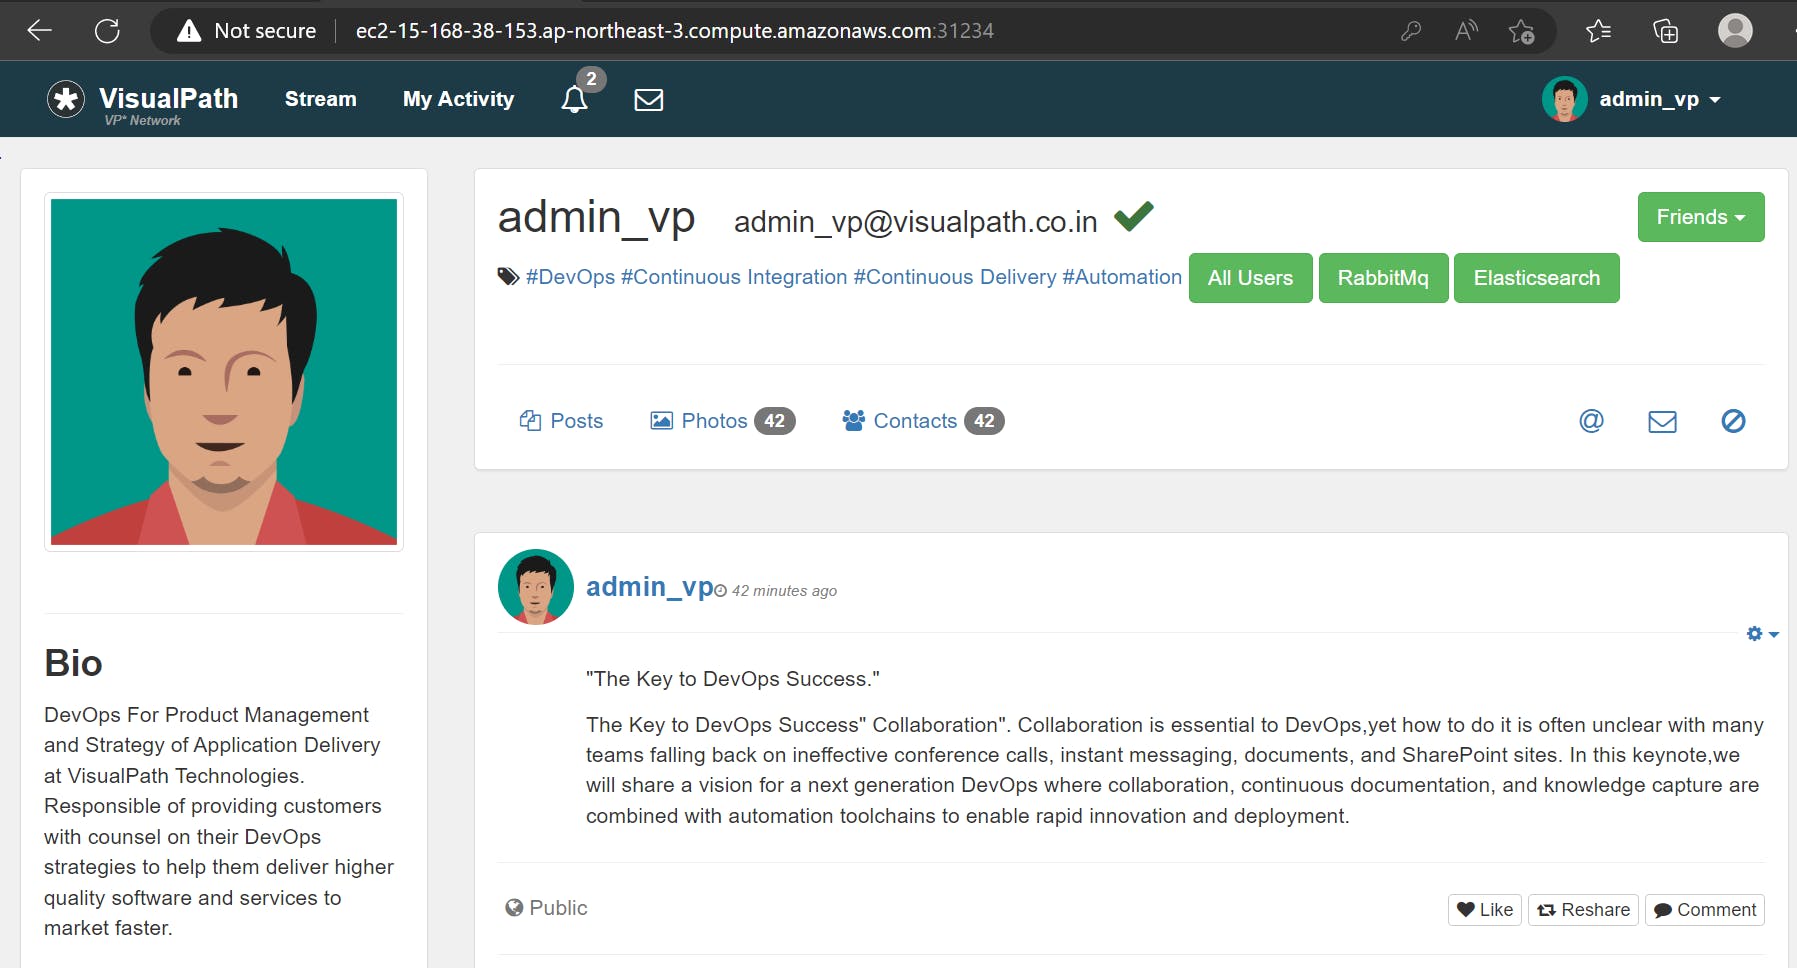
As you can see, app is running on port -31234, now try to access it :

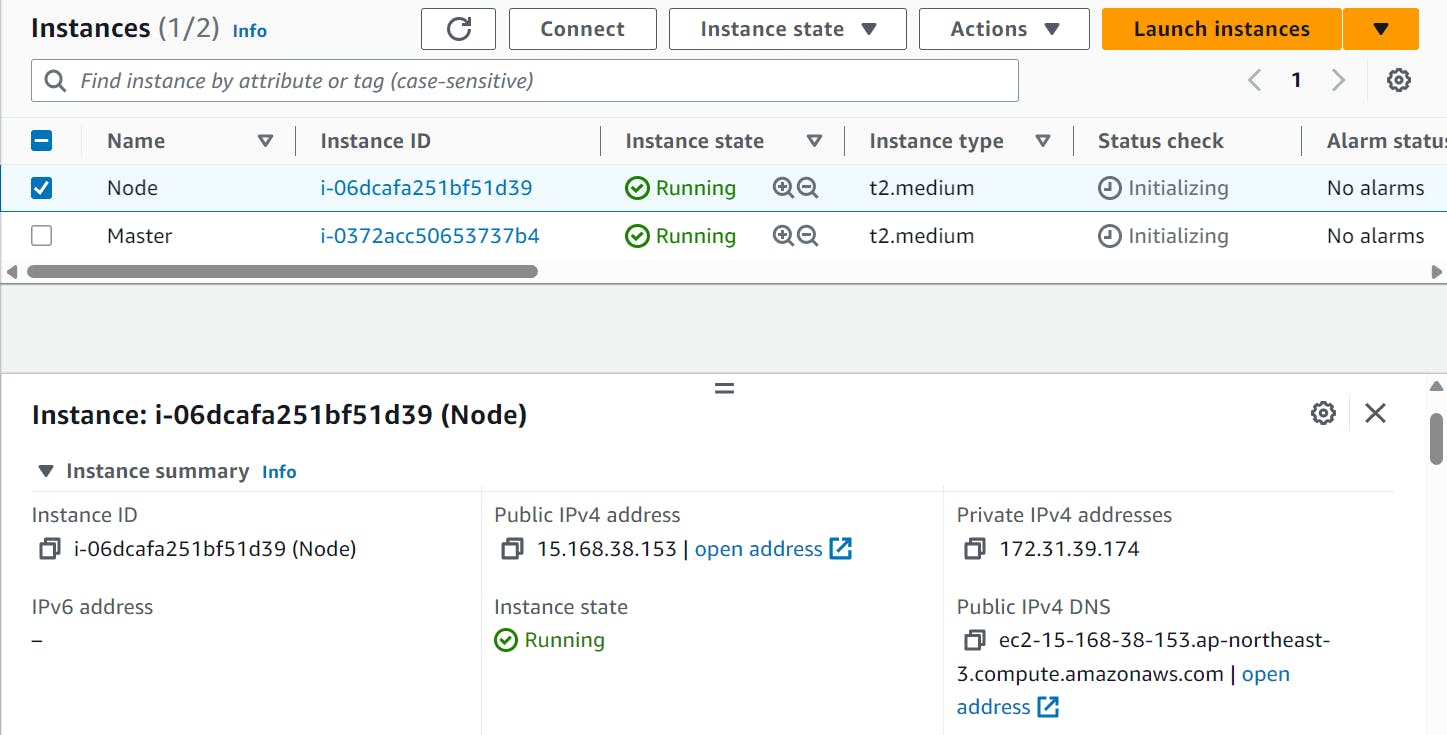
Access the Public IPV4 DNS with port number:
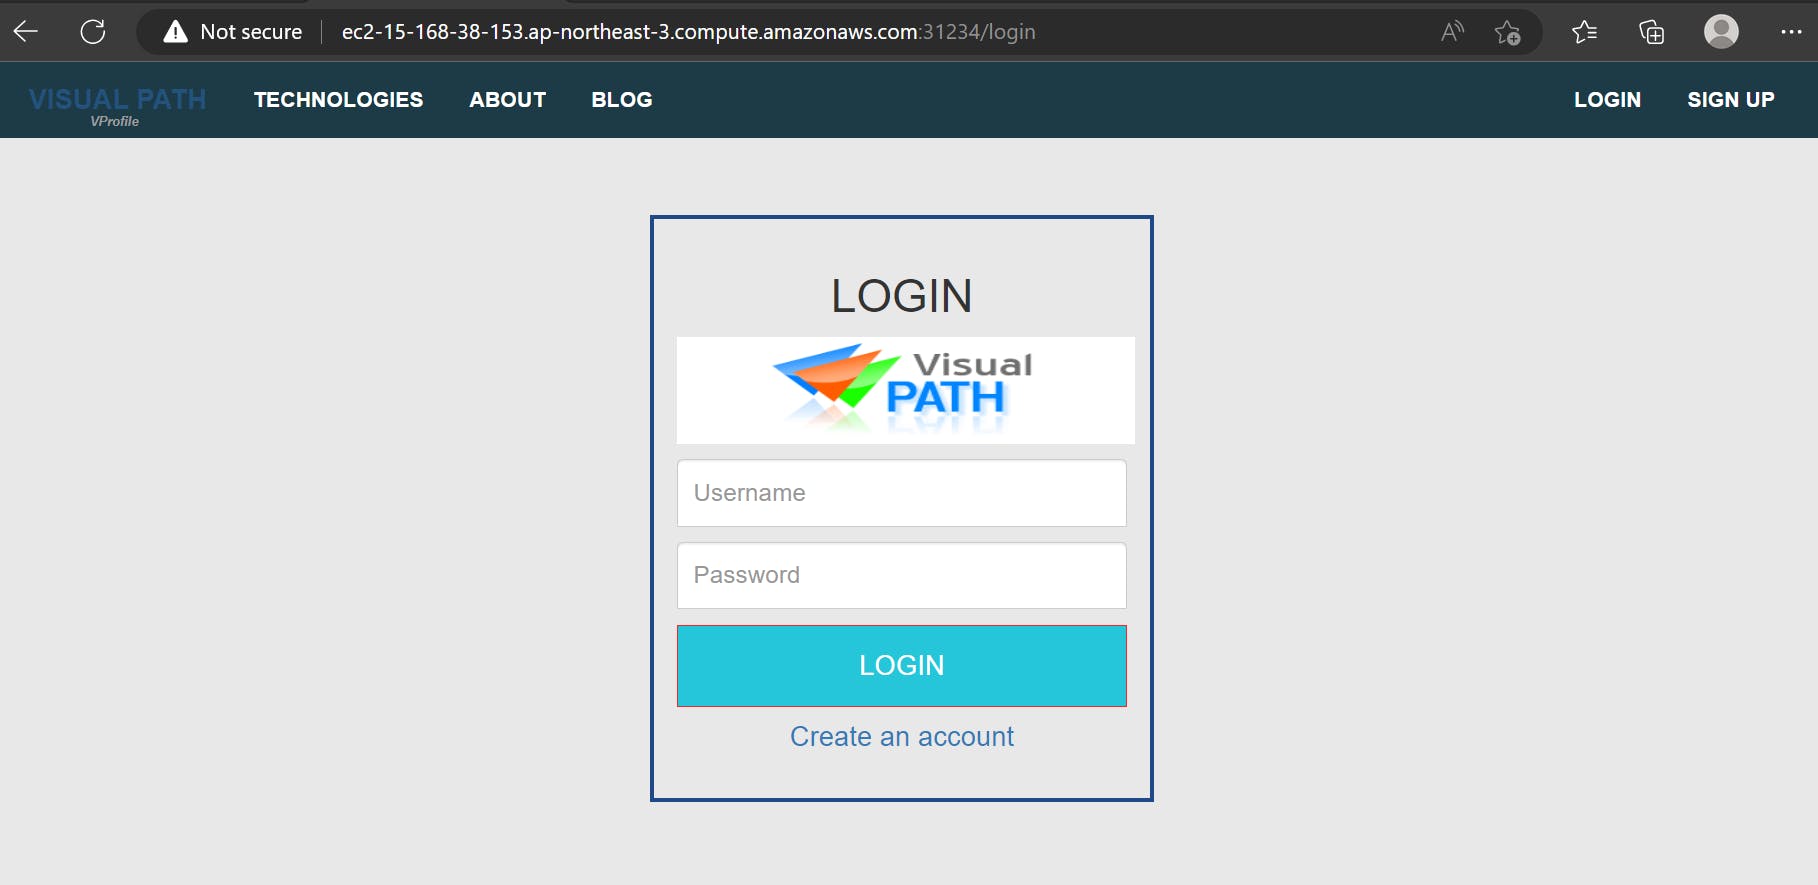
Now Login to check whether it is connected to the database or not: