

Permalink🚀 Introduction 🌞:
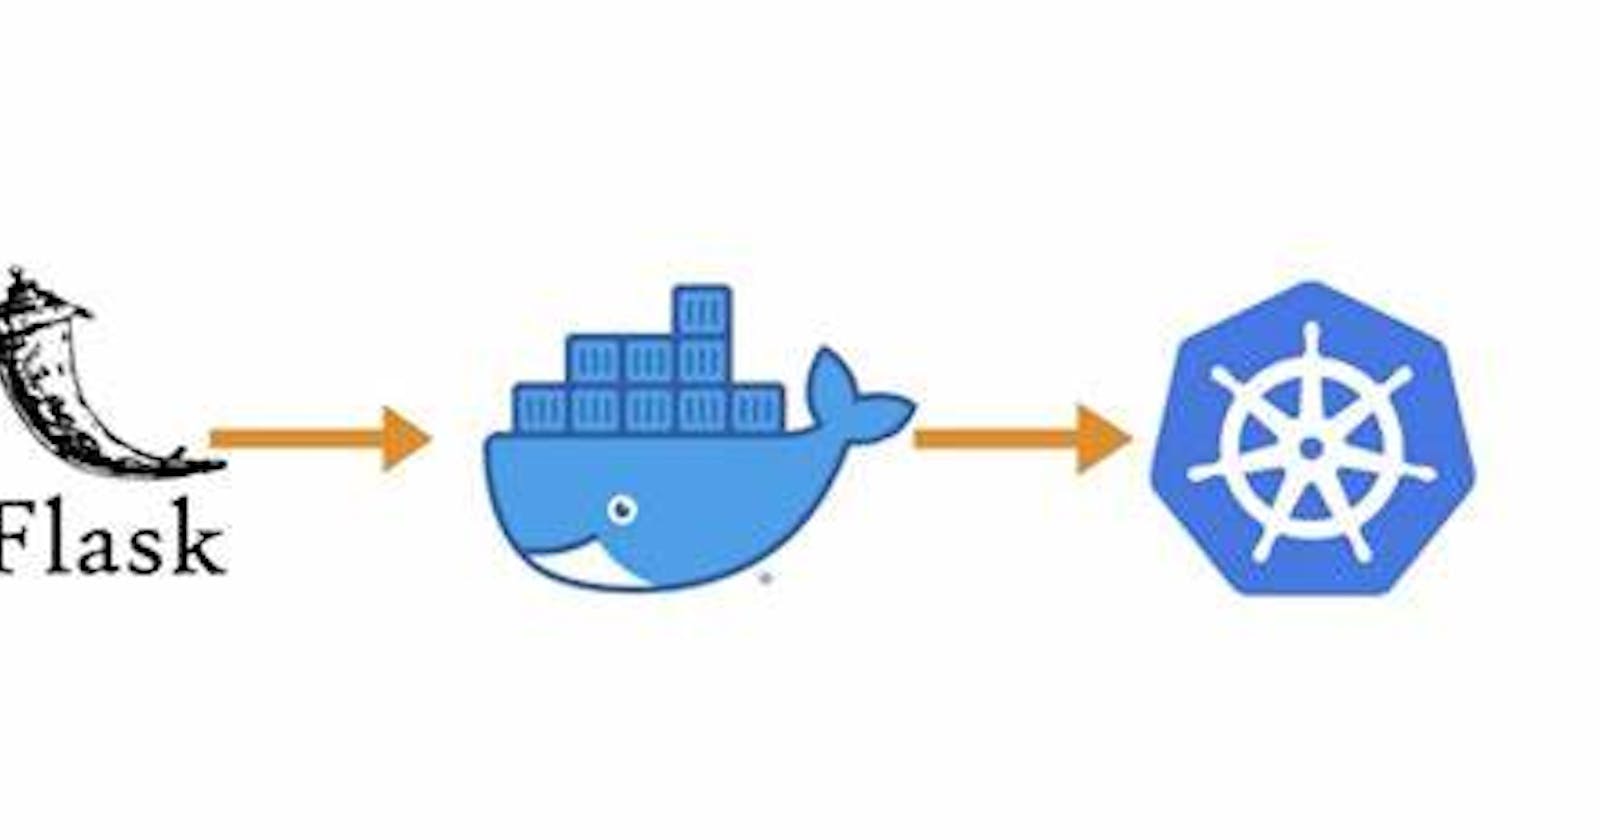
Kubernetes has emerged as the de facto standard for container orchestration, allowing developers to efficiently manage and scale their applications. In this article, we will walk you through the process of hosting a two-tier Flask application using Kubernetes. This setup will consist of a frontend/backend and Database tier, each running in separate containers within a Kubernetes cluster. By the end of this guide, you will have a scalable and resilient architecture for your Flask app.
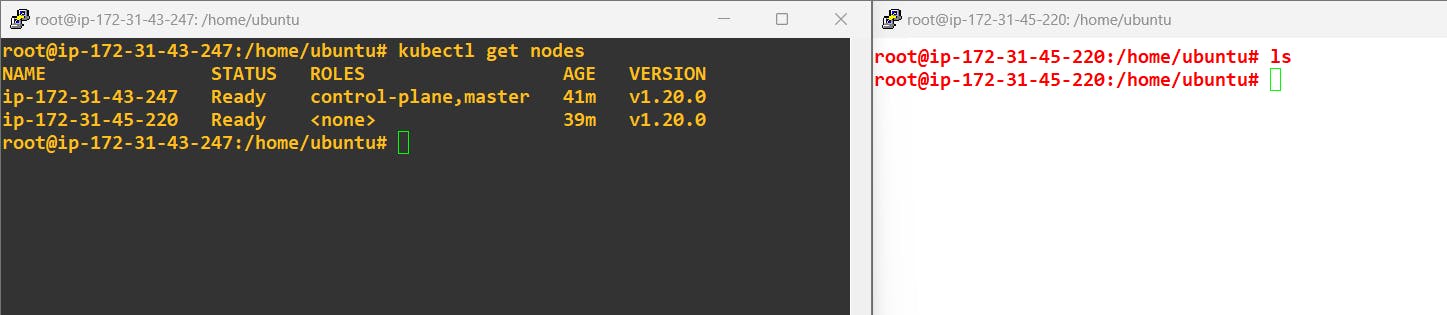
Permalink🚀Kubernetes Setup:
I have already set up a Kubernetes Cluster with master and worker nodes:
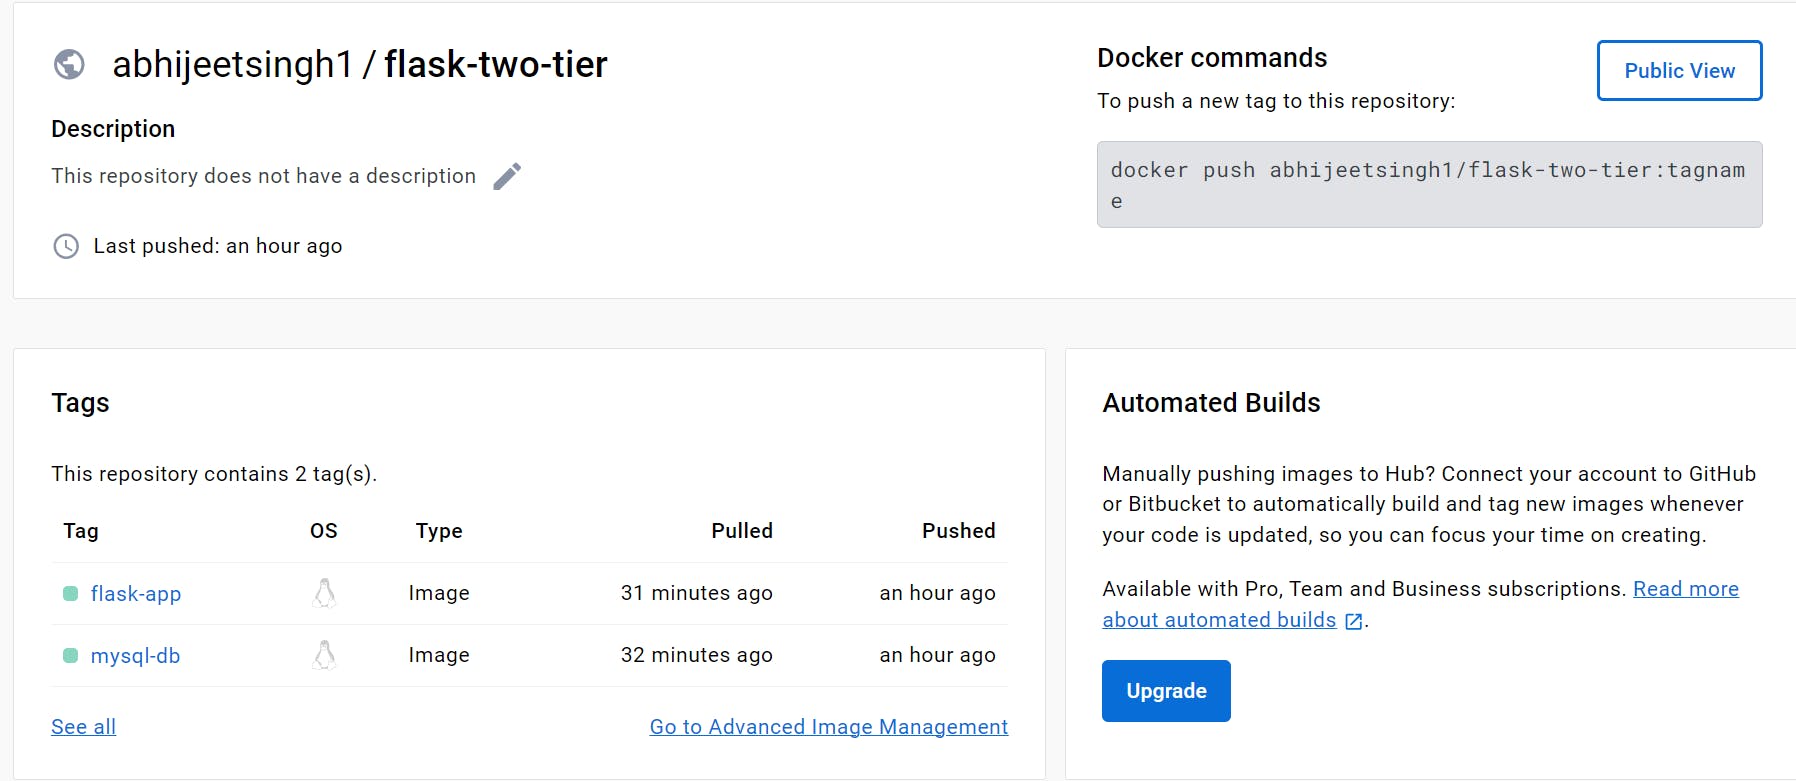
Permalink🚀Docker Images:
I have already pushed the Docker images into the Docker hub, I will use these images to deploy my application.
Permalink🚀Deploying Your App:
Step-1 Create a Deployment file for MySQL database:
apiVersion: apps/v1
kind: Deployment
metadata:
  name: mysql-deployment
spec:
  replicas: 1
  selector:
    matchLabels:
      app: mysql
  template:
    metadata:
      labels:
        app: mysql
    spec:
      containers:
        - name: mysql
          image: abhijeetsingh1/flask-two-tier:mysql-db
          env:
            - name: MYSQL_DATABASE
              value: mydatabase
            - name: MYSQL_USER
              value: user1
            - name: MYSQL_ROOT_PASSWORD
              value: mypassword
          ports:
            - containerPort: 3306
Step-2 Creating a Cluster-IP Service for my Database:
apiVersion: v1
kind: Service
metadata:
  name: mysql-service
spec:
  selector:
    app: mysql
  ports:
    - protocol: TCP
      port: 3306
      targetPort: 3306
  type: ClusterIP
Step-3 Creating a Deployment File for Web app:
apiVersion: apps/v1
kind: Deployment
metadata:
  name: flask-app-deployment
spec:
  replicas: 1
  selector:
    matchLabels:
      app: flask-app
  template:
    metadata:
      labels:
        app: flask-app
    spec:
      containers:
        - name: flask-app
          image: abhijeetsingh1/flask-two-tier:flask-app
          env:
            - name: DB_HOST
              value: mysql-service  # This is the DNS name of the MySQL ClusterIP Service
            - name: DB_PORT
              value: "3306"  # MySQL default port
            - name: DB_USER
              value: user1  # Replace with your MySQL username
            - name: DB_PASSWORD
              value: mypassword  # Replace with your MySQL password
          ports:
            - containerPort: 5000
Step-4 Create a Nodeport Service to expose it to the external world:
apiVersion: v1
kind: Service
metadata:
  name: flask-app-nodeport
spec:
  selector:
    app: flask-app
  ports:
    - protocol: TCP
      port: 80  # External traffic will be directed to this port
      targetPort: 5000  # Matches the containerPort of the Flask app
  type: NodePort
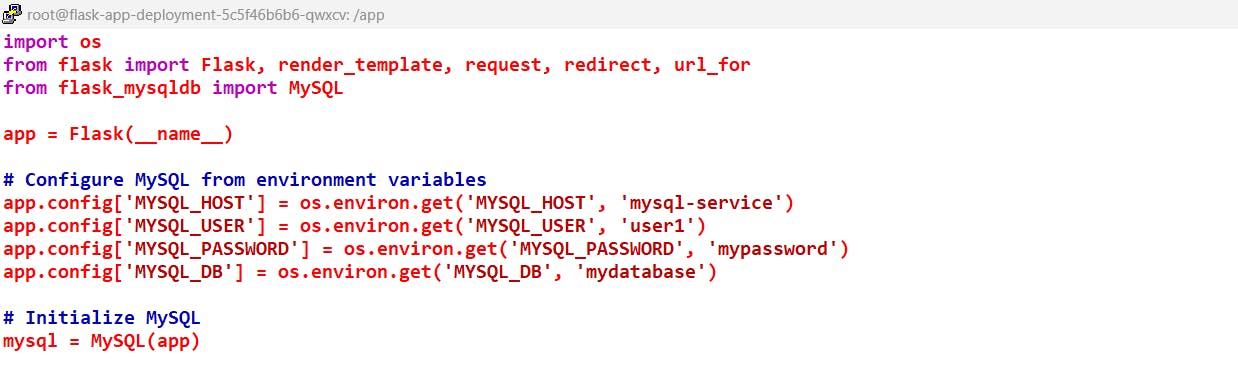
Note: FOR connection between Application and Database I am using DNS Based Service Discovery
Also, set the env in app.py.
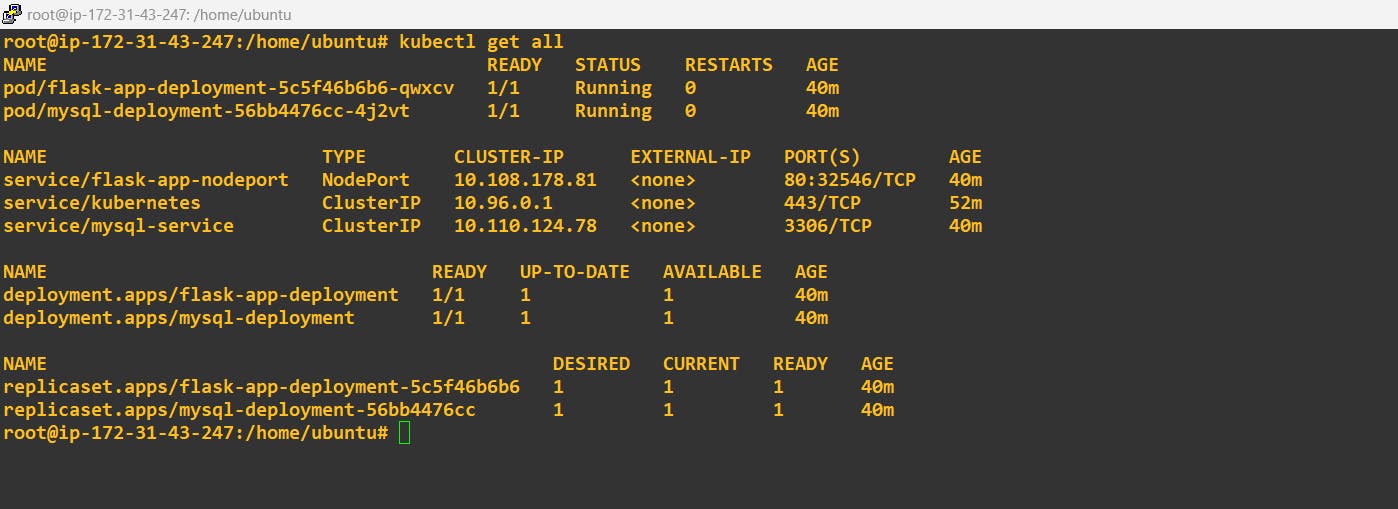
Step-5 Now apply all services and Deployment yml file :
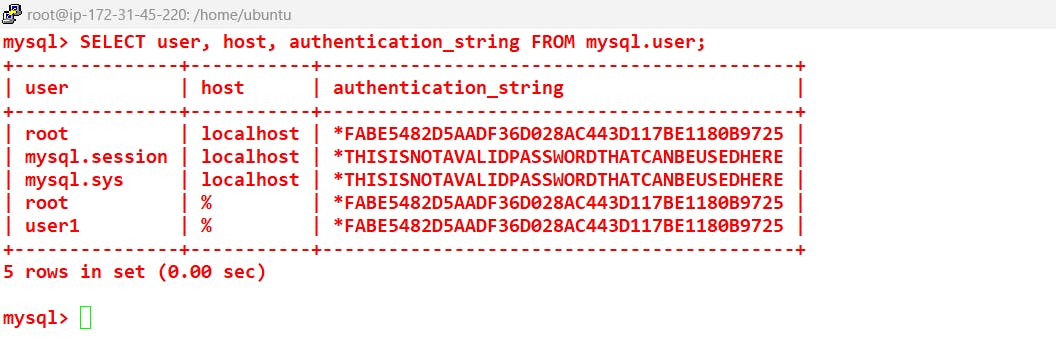
Step-6 Just verify the Database name and user in MySQL:
use Command:
mysql -h 10.110.124.78 -u root -p

Verify the user that you have created:
SELECT user, host, authentication_string FROM mysql.user;
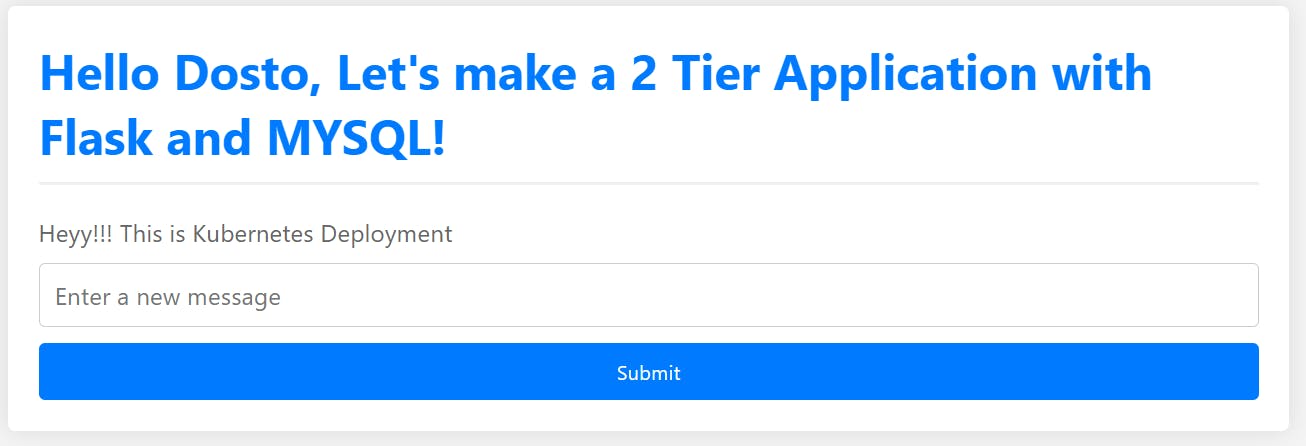
Step-7 Try to access your web app using node and node port:

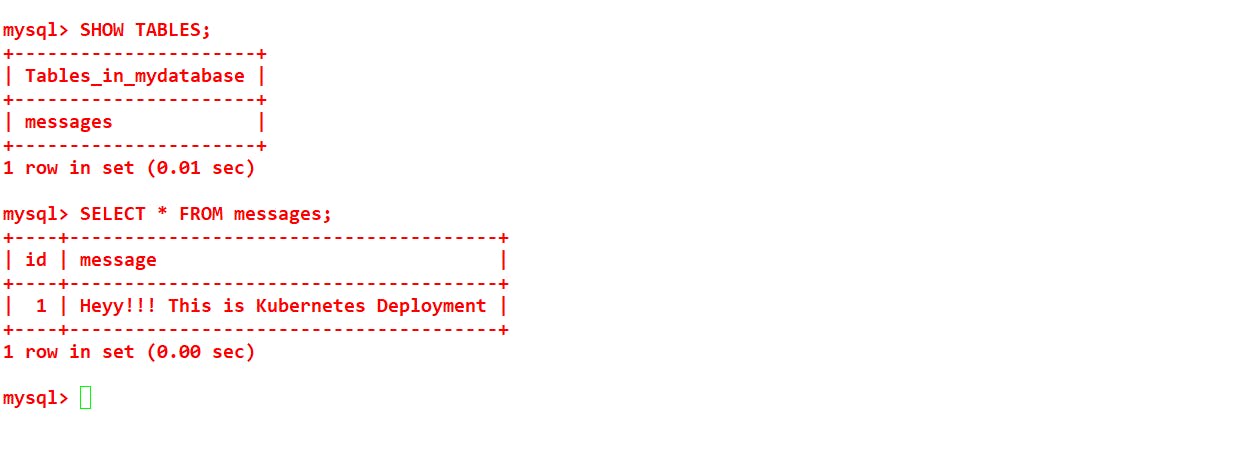
Create some entries into it and verify with the database:
Now check it inside the Database:
++++++++++++++++THANK YOU++++++++++++++++++