

What is a Declarative Pipeline?
A Declarative Pipeline is a more structured and opinionated way of defining a pipeline in Jenkins. It uses a predefined syntax and provides a simplified approach to defining pipelines. It is recommended for beginners as it is easier to learn and understand. The Declarative Pipeline is defined using a DSL (Domain-Specific Language) and can be stored and versioned as code in a version control system.
Step 1: Create a new Pipeline job
First, navigate to your Jenkins instance and click on "New Item" to create a new Pipeline job. Give your job a name and select "Pipeline" as the job type.
Step 2: Define the Pipeline Script
Under the "Pipeline" section, select "Pipeline script" as the definition. In the "Script" text area, paste the following code:


+++++++++++++++++++++++++++++++++++++++++++++++++++++++++++++
Introduction:
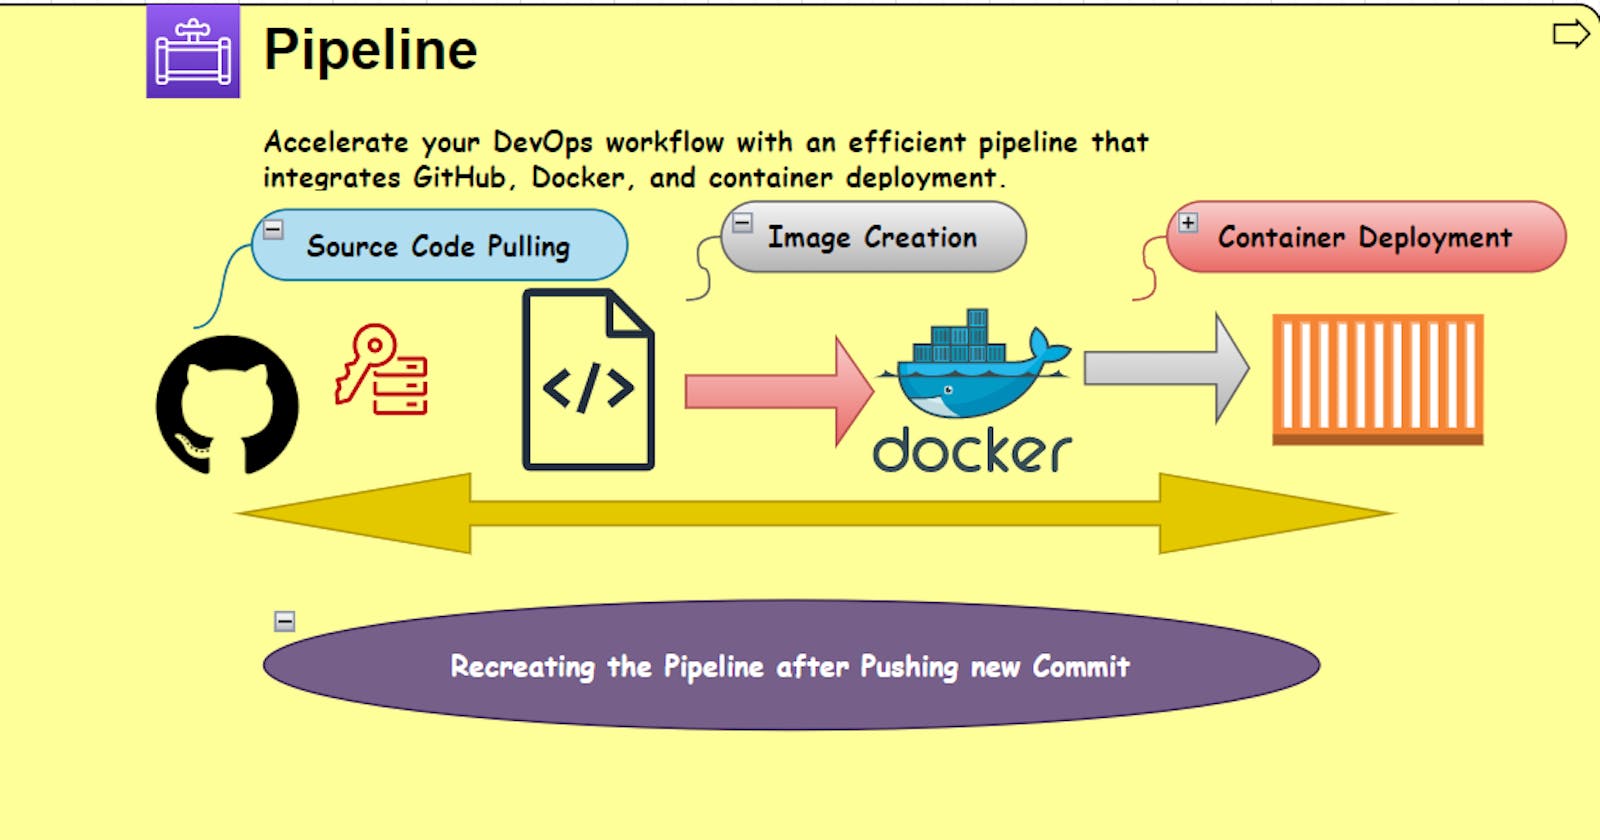
In today’s world, automation is everything. With the help of automation tools, we can save a lot of time, reduce human errors, and improve the overall quality of our work. One such tool is Jenkins, which is an open-source automation server that can help us automate our build, test, and deployment processes. In this blog post, we will discuss how to create a Jenkins pipeline to clone a private repository, build a Docker image, and run a container.
Section 1:
Configuring Git credentials in Jenkins Before we can start building our pipeline, we need to ensure that we have the necessary credentials to access our private repository. To do this, we need to create a new "Username with password" credential in Jenkins.

Also, add Webhook to GitHub Repository:


Section 2:
Setting up a Jenkins pipeline for Docker builds Now that we have our Git credentials set up, we can create a new pipeline in Jenkins and configure the pipeline agent to run on a Docker-capable machine.
Create a new pipeline in Jenkins by clicking on "New Item" in the Jenkins menu and selecting "Pipeline".
Enter a name for your pipeline and select "Pipeline" as the type.
Under the "Pipeline" section, select "Pipeline script" and enter the following script:
Replace "YOUR_GIT_CREDENTIALS_ID" with the ID of the Git credentials you created in Section 1.
Replace "YOUR_GIT_REPOSITORY" with the URL of your private Git repository.
Save your pipeline.

Write Pipeline for your Project:

Section-3
Section 3: Running Docker containers from Jenkins Now that our pipeline is set up, we can run it and see our Docker container in action. Here's how:
Click on the name of your pipeline in the Jenkins menu to open it.
Click on "Build Now" to run the pipeline.

Section-4
Now commit the change into your docker file and push it into GitHub:

i have added a few lines in my code now I will commit it and push it to Github, let's see how my pipeline rebuilds it again after pushing it into GitHub.


As I push it into Github, Jenkins Automatically triggered to build Pipeline again:

+++++++++++++++++++++++++++++++++++++++++++++++++++++++++++++