

Automation in AWS
Automation, a capability of AWS Systems Manager, simplifies common maintenance, deployment, and remediation tasks for AWS services like Amazon Elastic Compute Cloud (Amazon EC2), Amazon Relational Database Service (Amazon RDS), Amazon Redshift, Amazon Simple Storage Service (Amazon S3), and many more.
Launch template in AWS EC2
You can make a launch template with the configuration information you need to start an instance. You can save launch parameters in launch templates so you don't have to type them in every time you start a new instance.
For example, a launch template can have the AMI ID, instance type, and network settings that you usually use to launch instances.
You can tell the Amazon EC2 console to use a certain launch template when you start an instance.
Instance Types
Amazon EC2 has a large number of instance types that are optimised for different uses. The different combinations of CPU, memory, storage and networking capacity in instance types give you the freedom to choose the right mix of resources for your apps. Each instance type comes with one or more instance sizes, so you can adjust your resources to meet the needs of the workload you want to run.
AMI
An Amazon Machine Image (AMI) is an image that AWS supports and keeps up to date. It contains the information needed to start an instance. When you launch an instance, you must choose an AMI. When you need multiple instances with the same configuration, you can launch them from a single AMI.
Task 1: Create a template
Navigate to Launch template section in AWS and create a template.
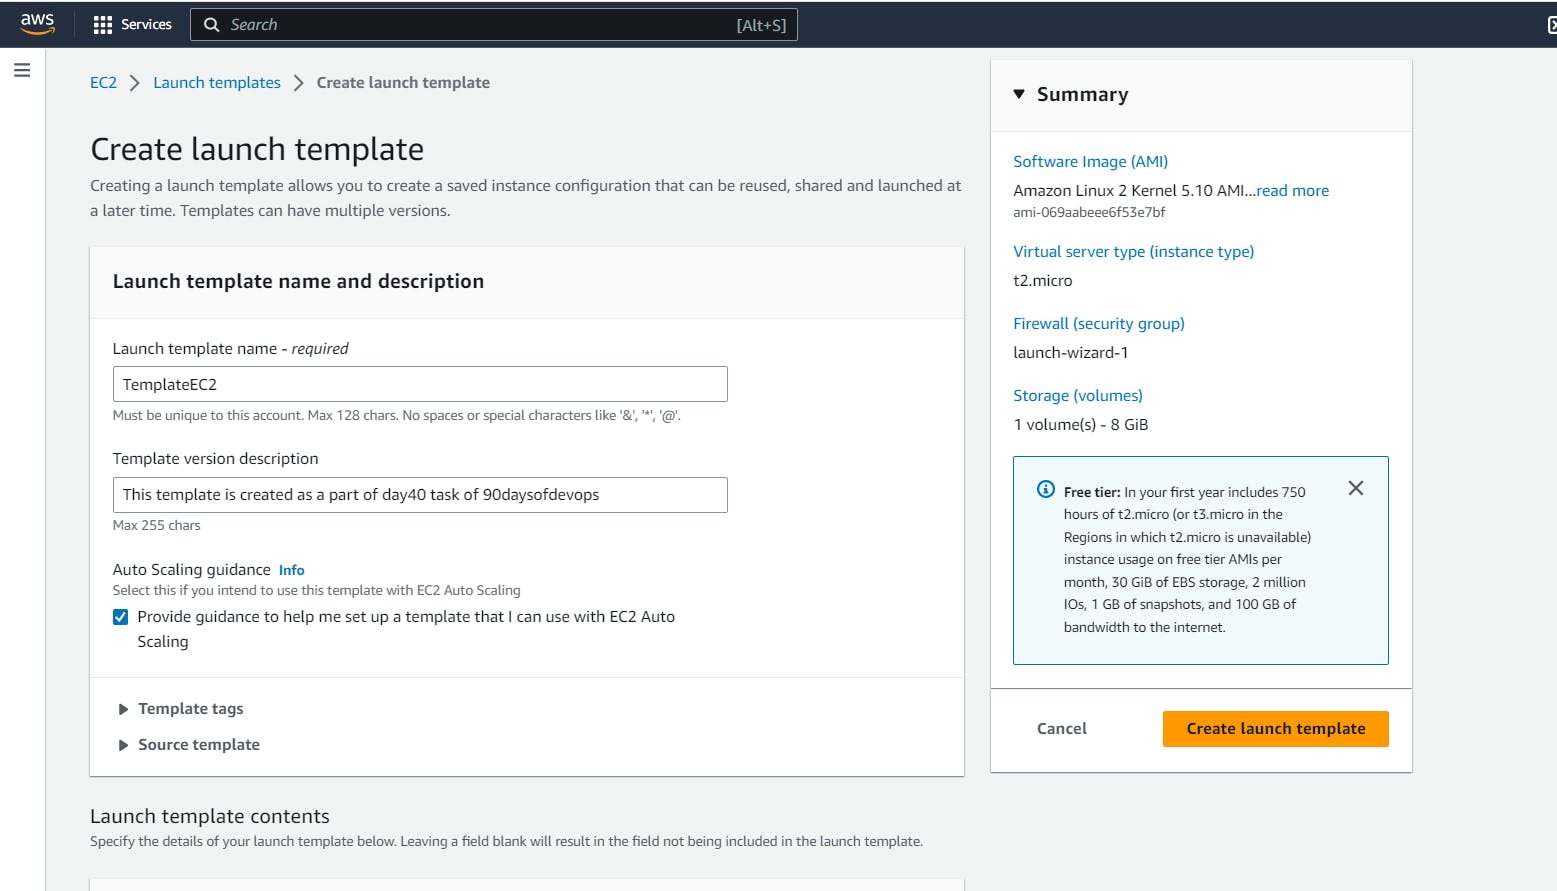
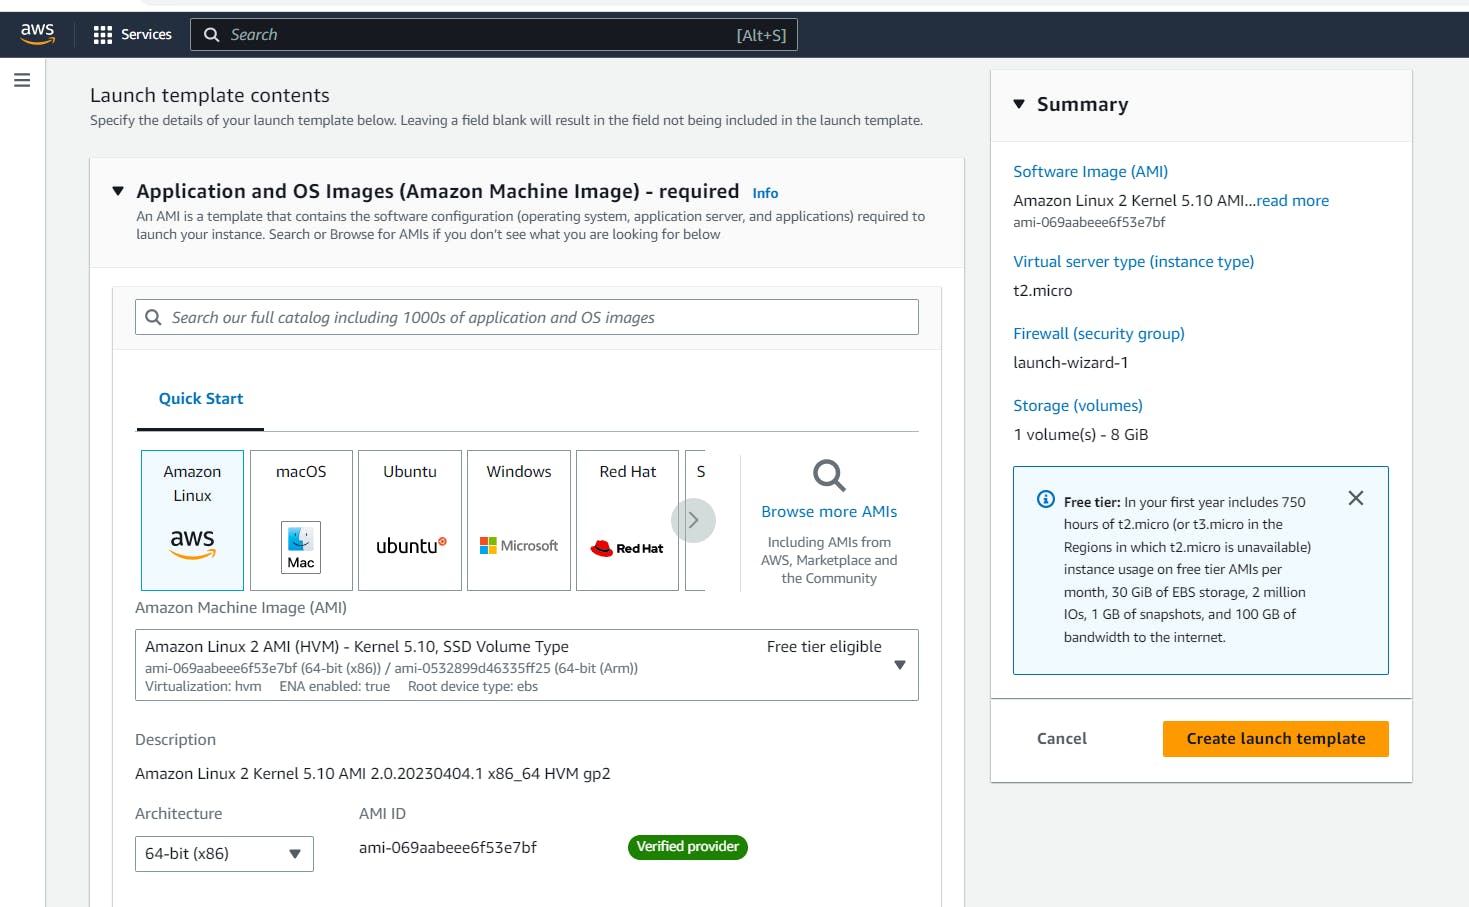
Provide the AMI as Amazon Linux 2 as per requirement.
Provide the shape of the EC2 instance as per the required CPU and Memory.
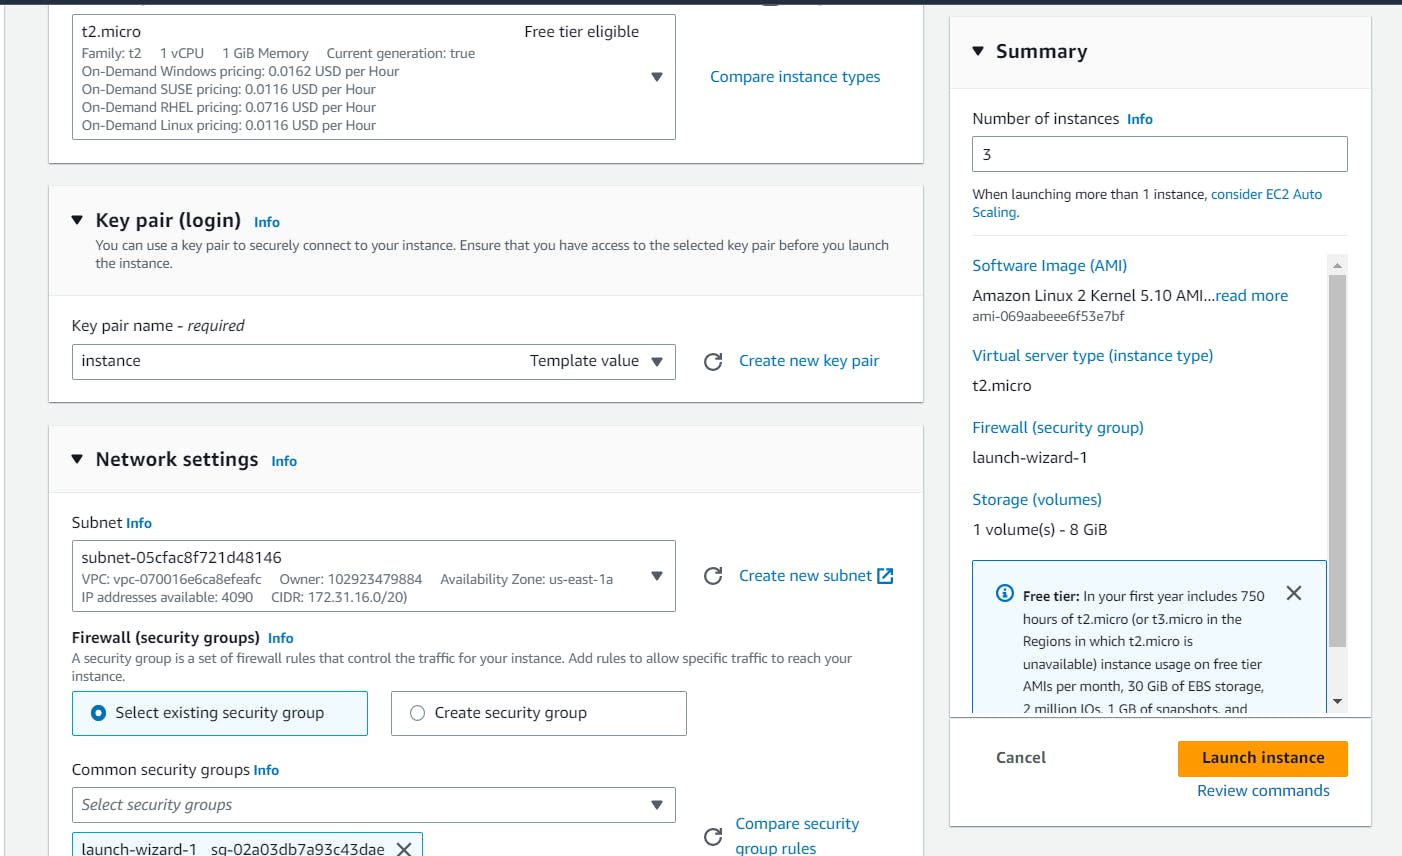
Select the subnet and security group.
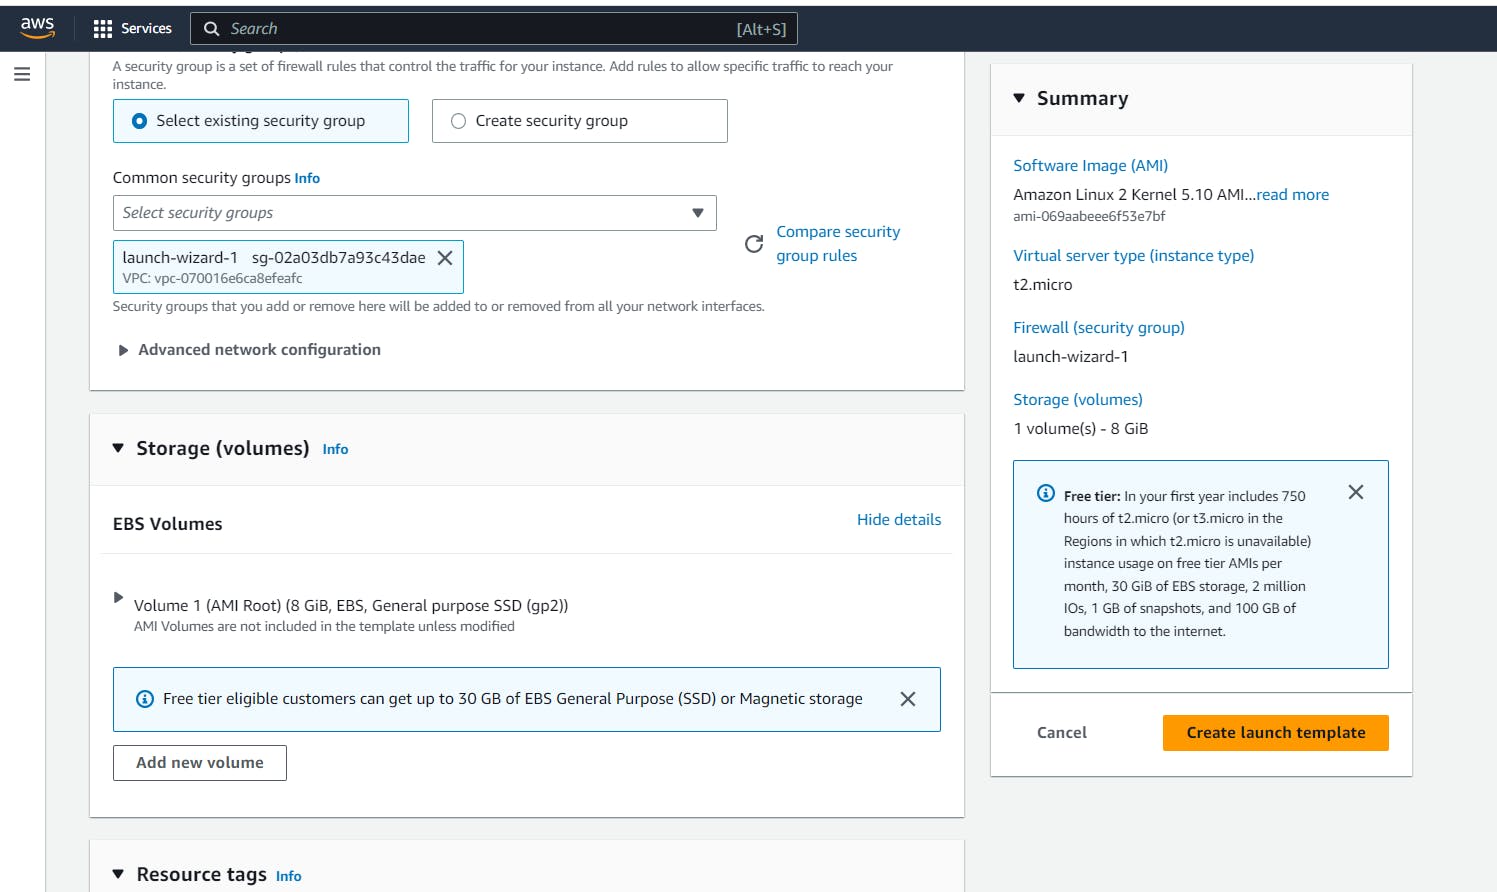
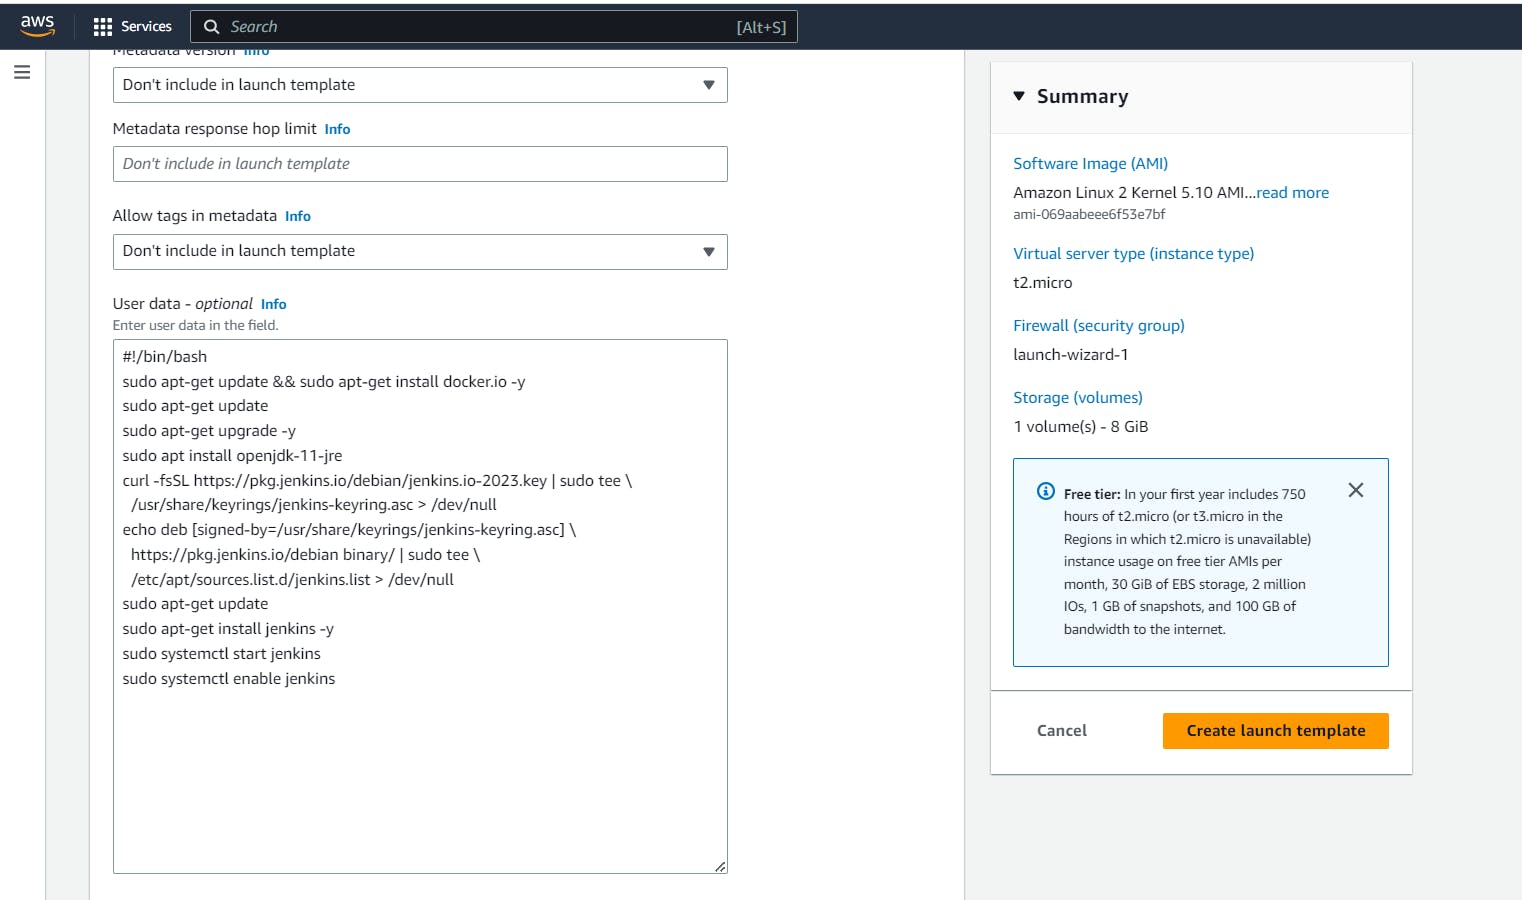
In the additional section, you can provide a shell script to install docker and Jenkins as pre-requisite to the server.
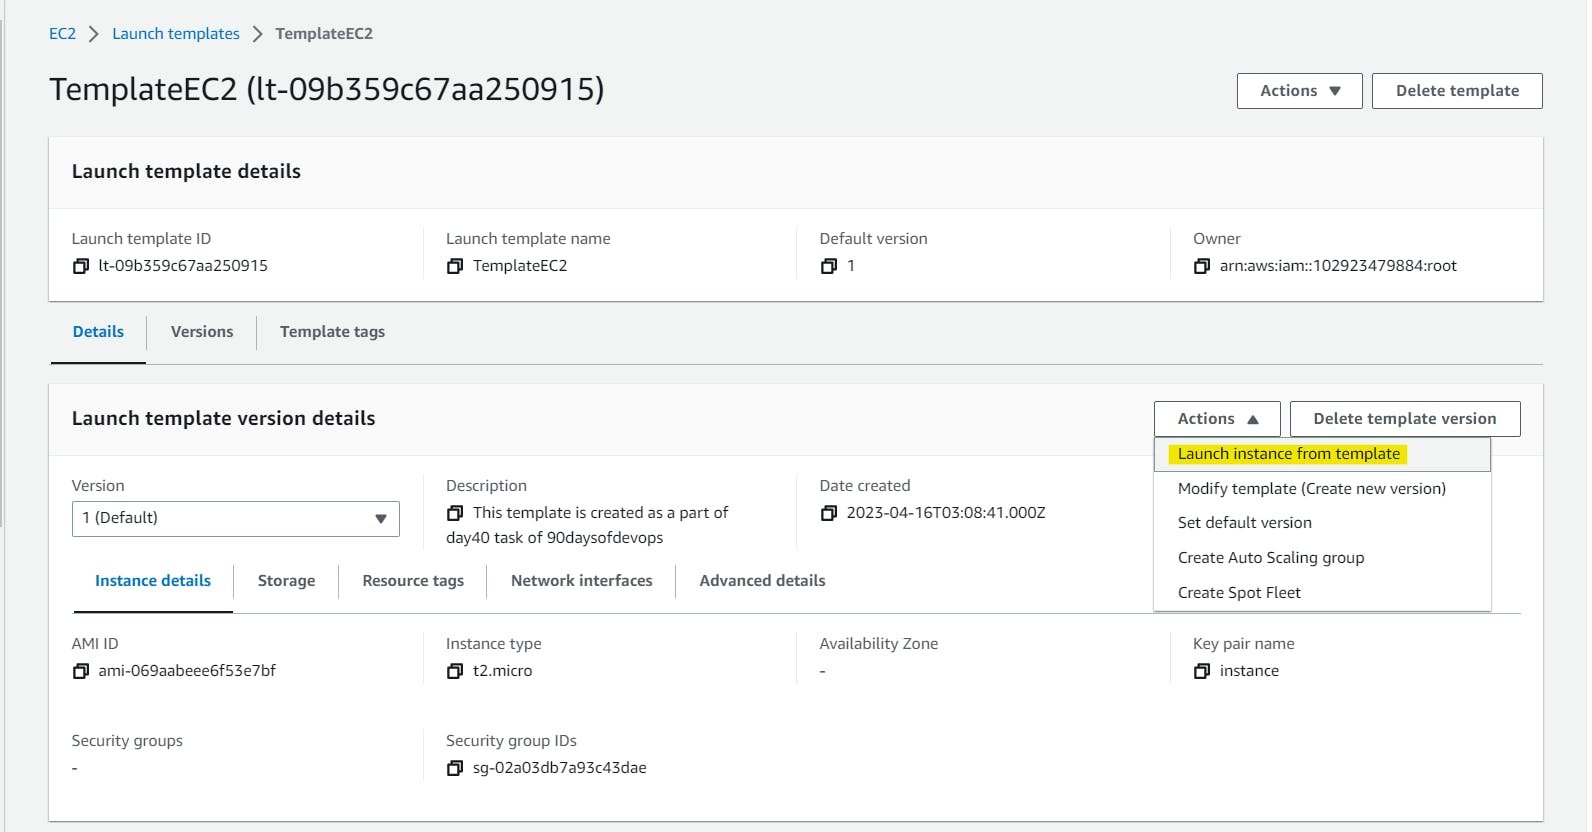
Now click to create template and then navigate to Action section to launch instance out of created template.
Provide the desired number of instance as shown.
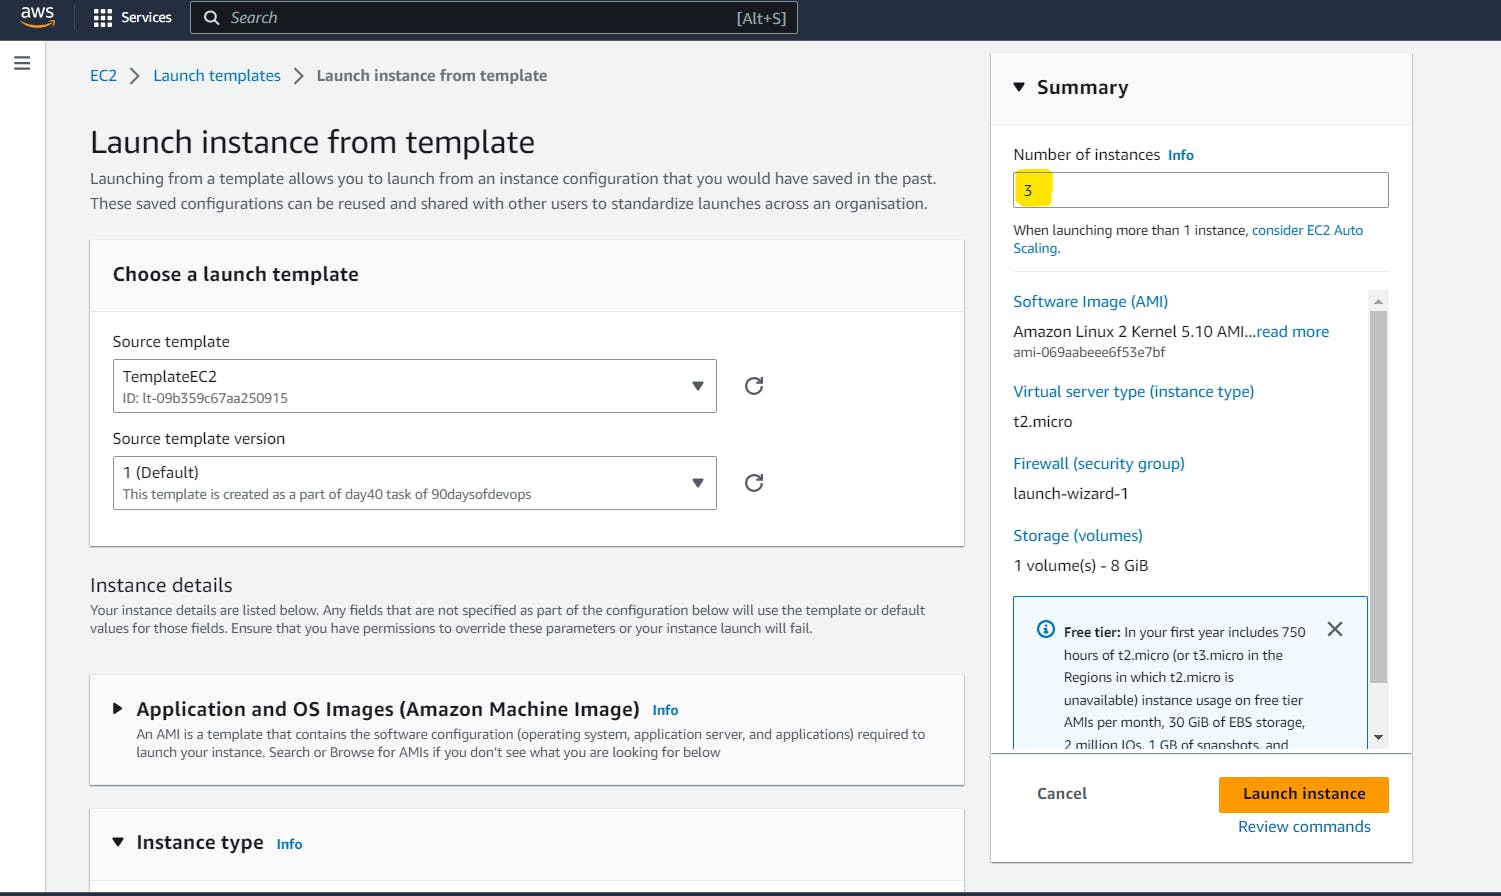
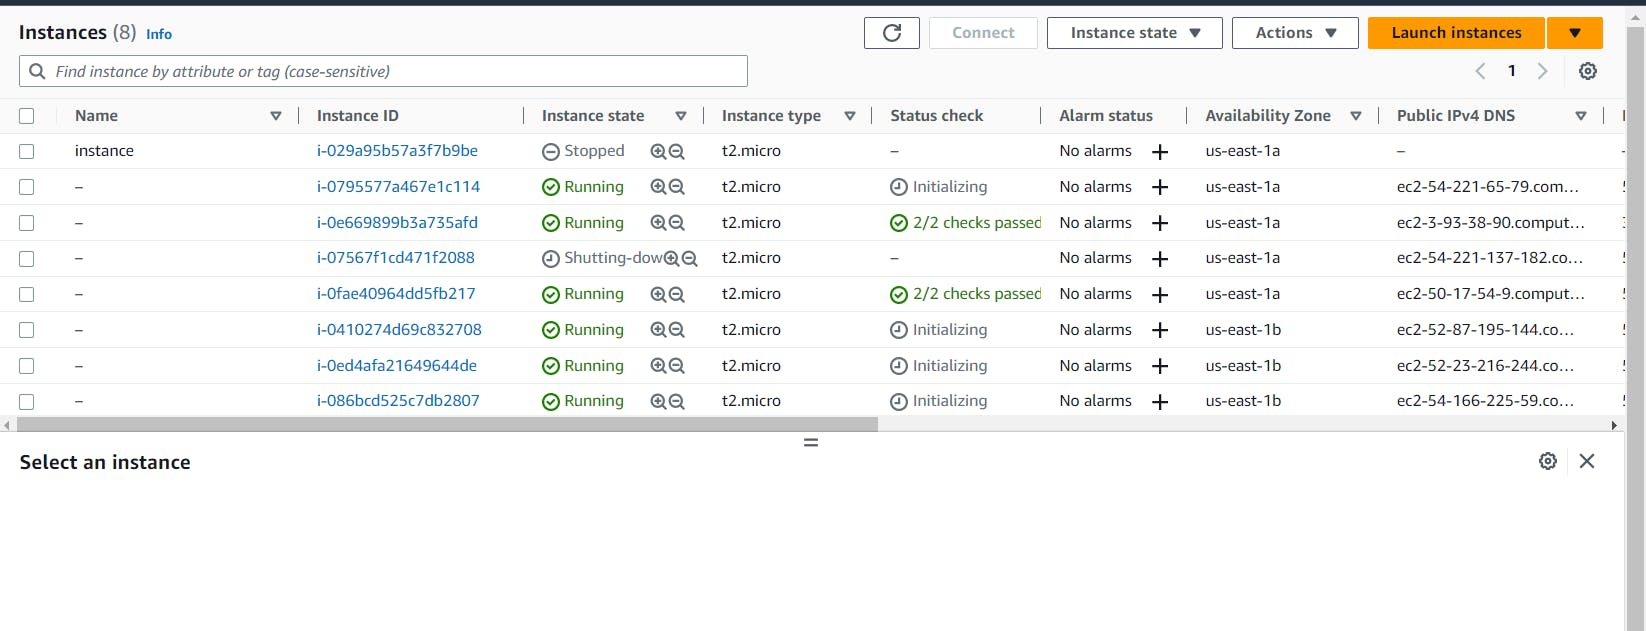
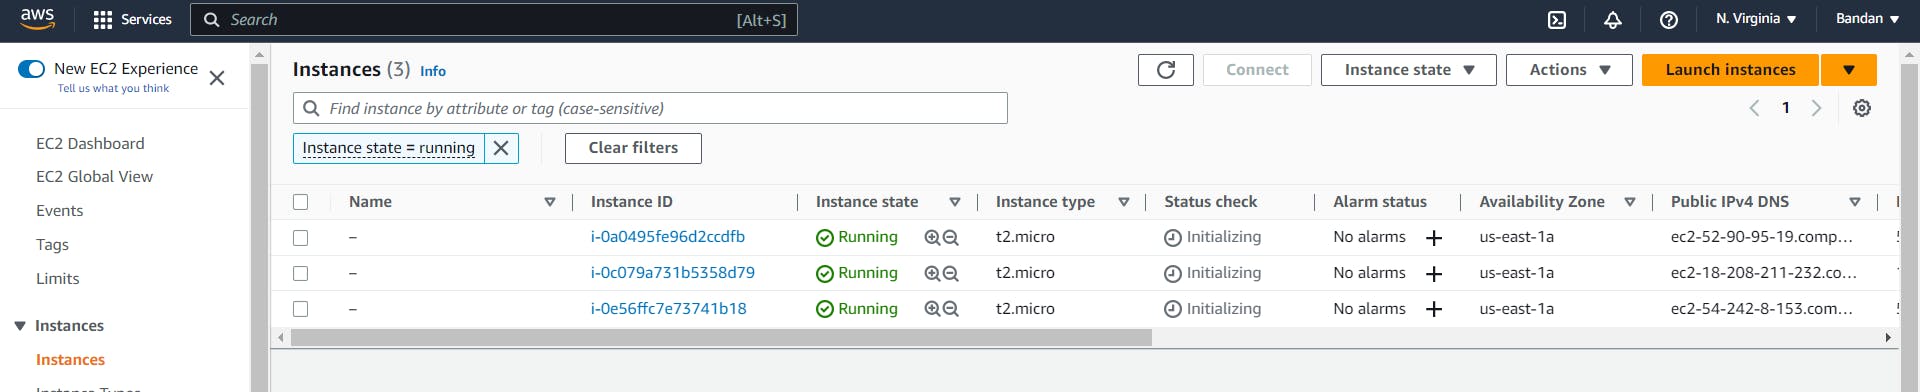
Navigate to the instance section in the EC2 dashboard and the instances will be now created. Here we have created 3 instances.
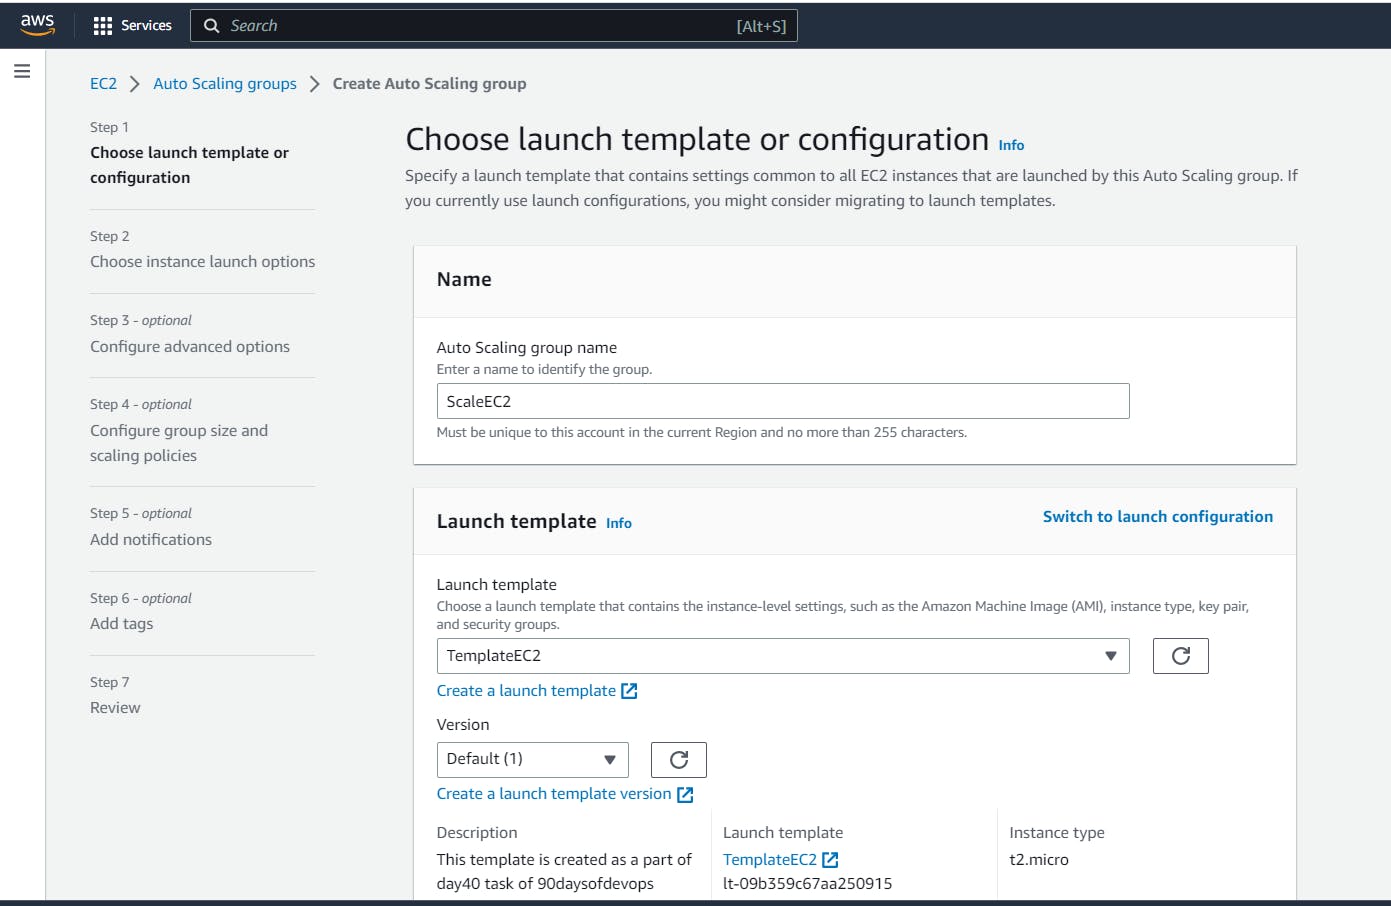
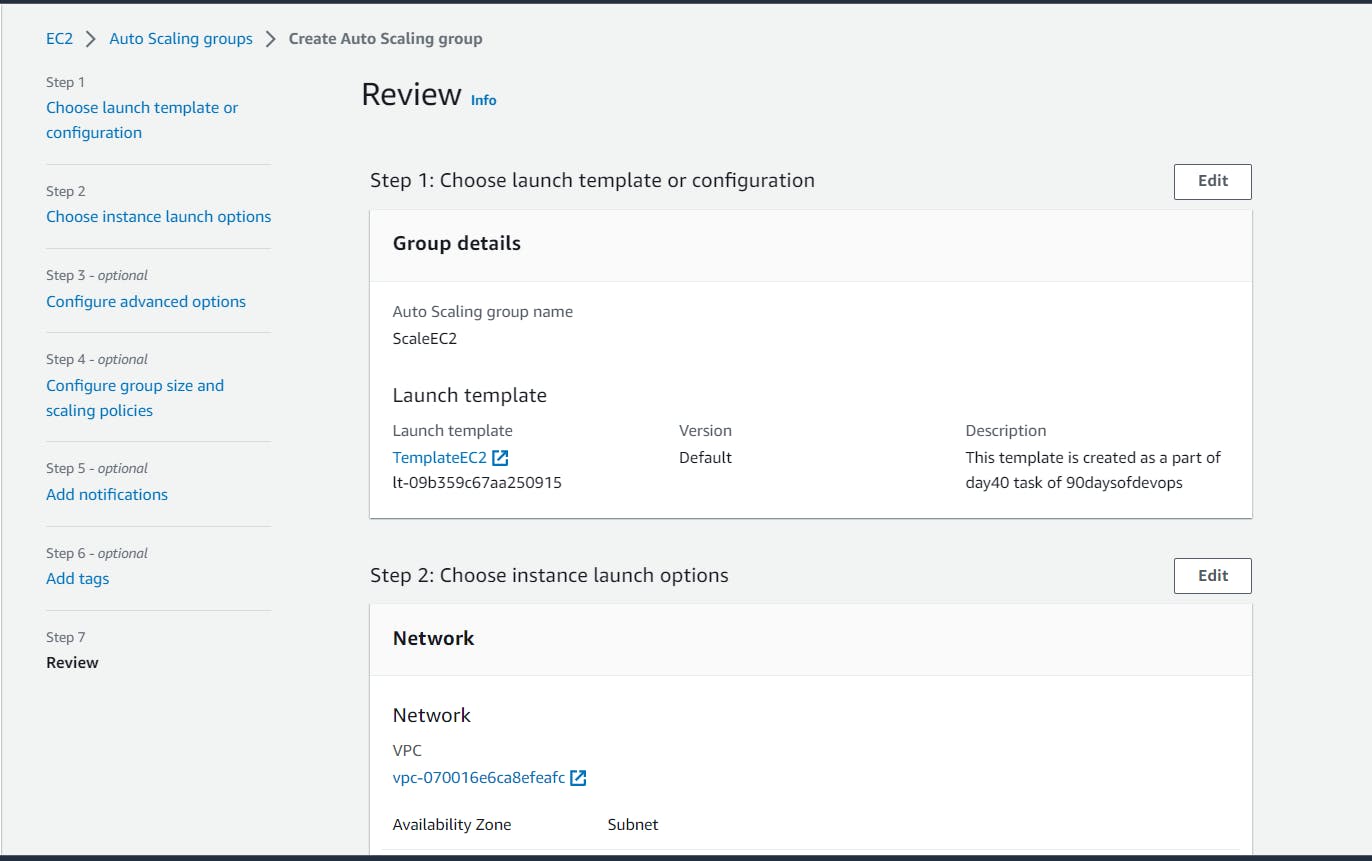
Task 2: Create an Auto-Scaling group.
Navigate to the Autoscaling group section and give a name to the group that will be created. Select the template that we have created in the above task.
Provide the subnet you want to keep your servers at.

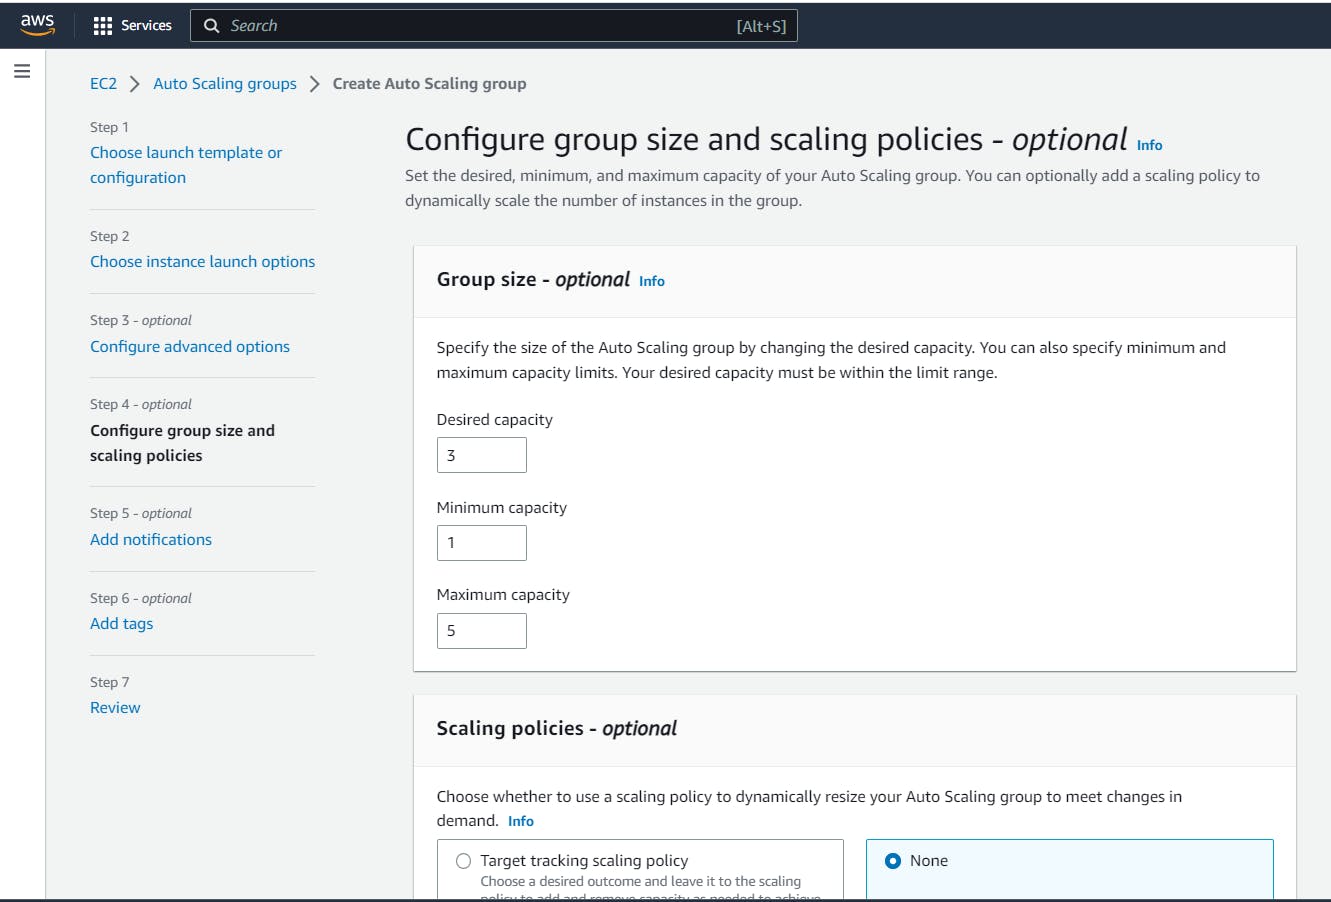
Provide the desired capacity and maximum capacity of the group to create servers.
Review and now create the group.
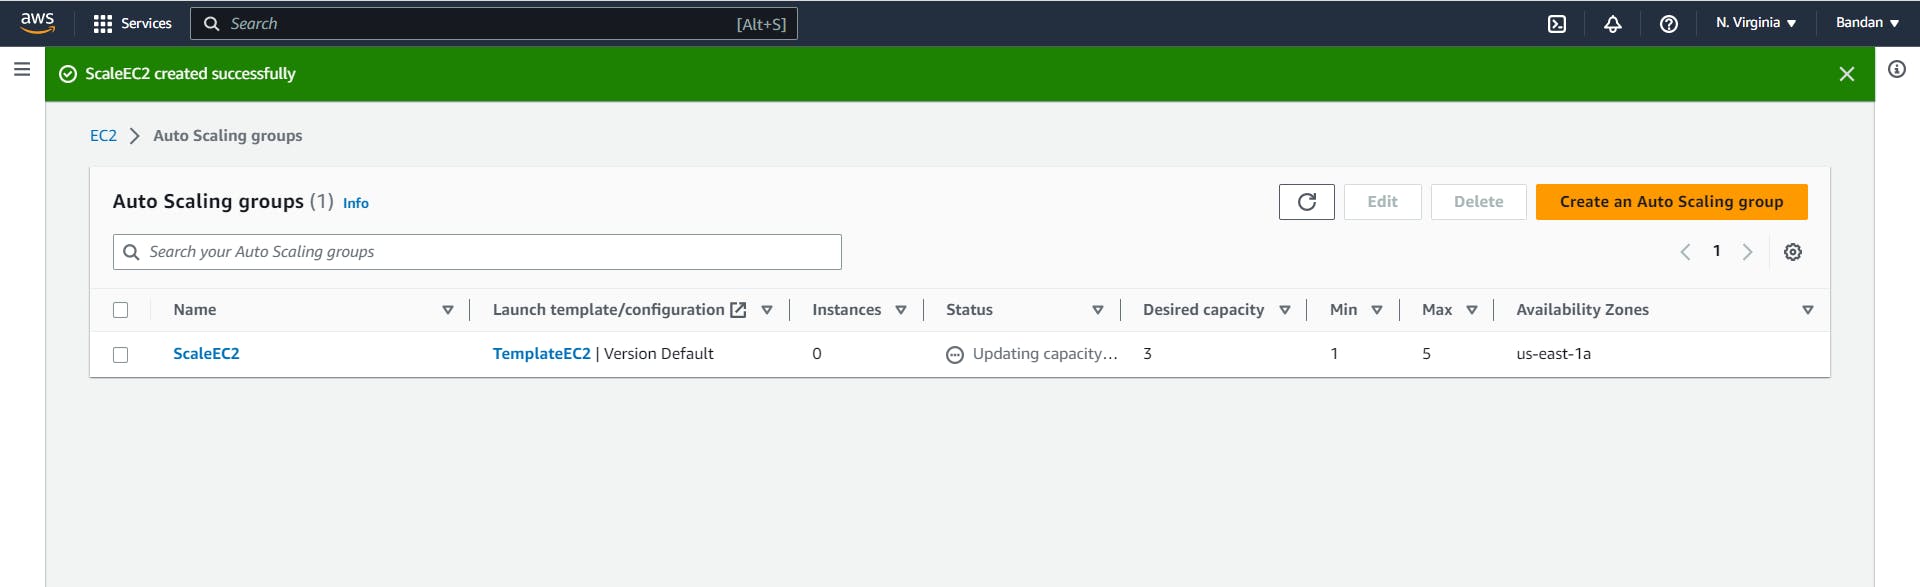
Now, navigate to the instance section and you can see 6 servers.
Out of 6, 3 servers were created for above task 1 and the rest 3 are spun up by the Auto-Scaling group as the desired field we gave is 3.