


Table of contents
What are Persistent Volumes in k8s:
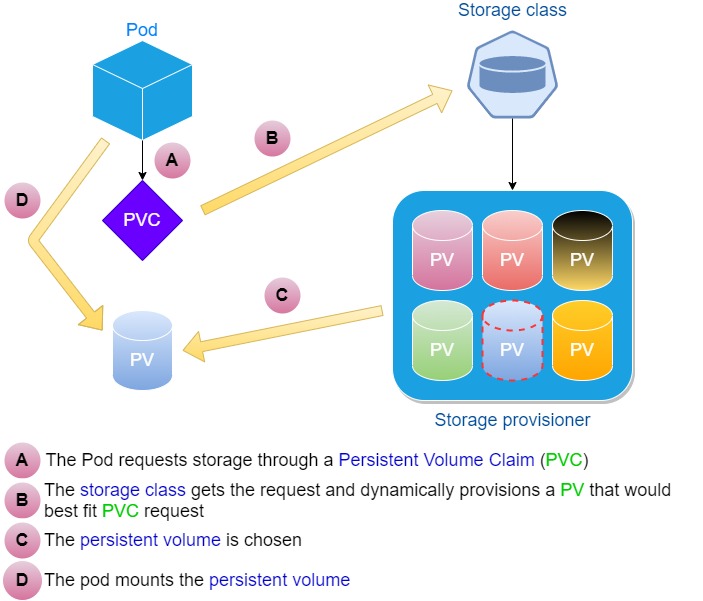
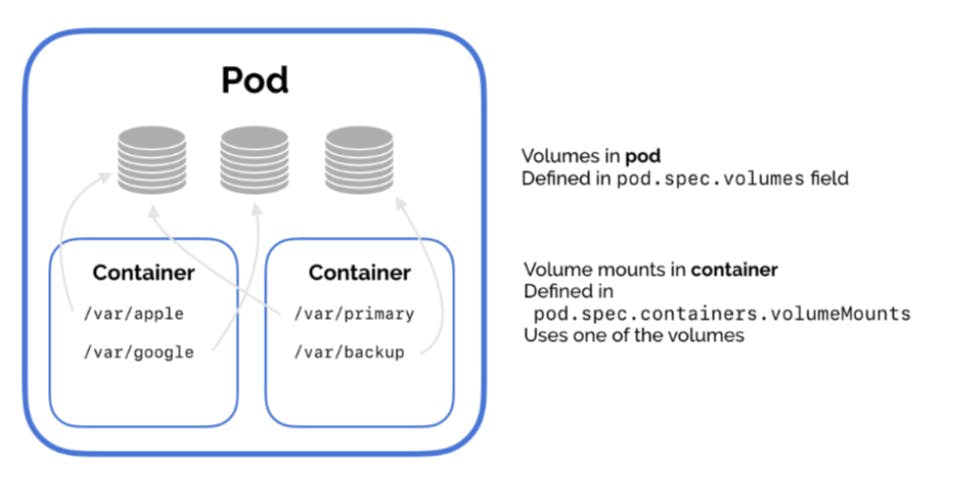
In Kubernetes (k8s), a Persistent Volume (PV) is a piece of storage in the cluster that has been provisioned by an administrator or dynamically created using a StorageClass. It is a way to decouple the storage from the Pod so that it can survive Pod rescheduling and Pod termination.
A Persistent Volume can be created in a variety of ways, including network-attached storage, local storage, or cloud provider-specific storage. Once created, it can be used by a Pod via a Persistent Volume Claim (PVC), which is a request for storage resources that specifies the desired capacity and access mode.
Task 1:
Add a Persistent Volume to your Deployment todo app.
Create a Persistent Volume using a file on your node. Template
Create a Persistent Volume Claim that references the Persistent Volume. Template
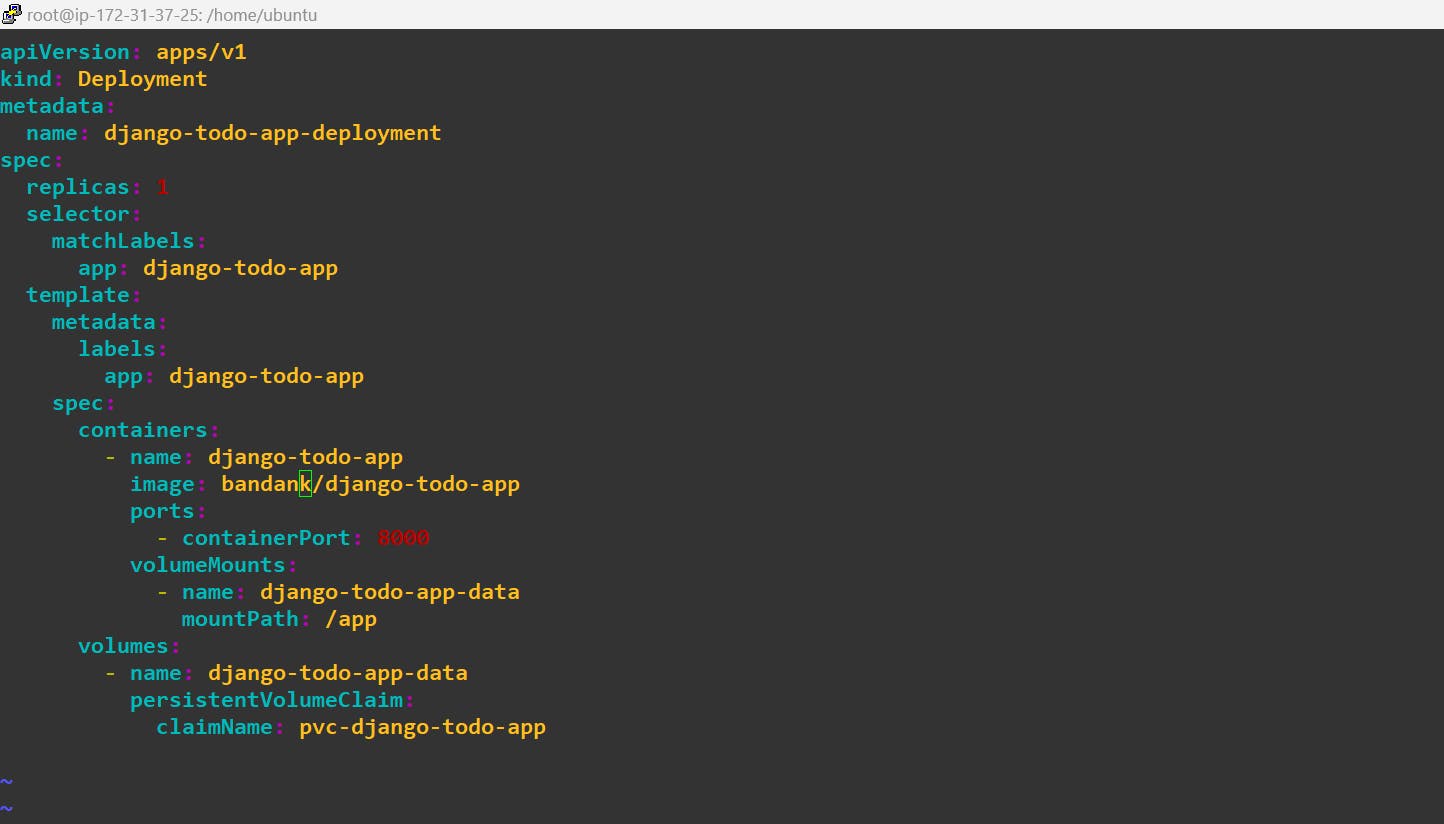
Update your deployment.yml file to include the Persistent Volume Claim. After Applying pv.yml pvc.yml your deployment file look like this Template
Apply the updated deployment using the command:
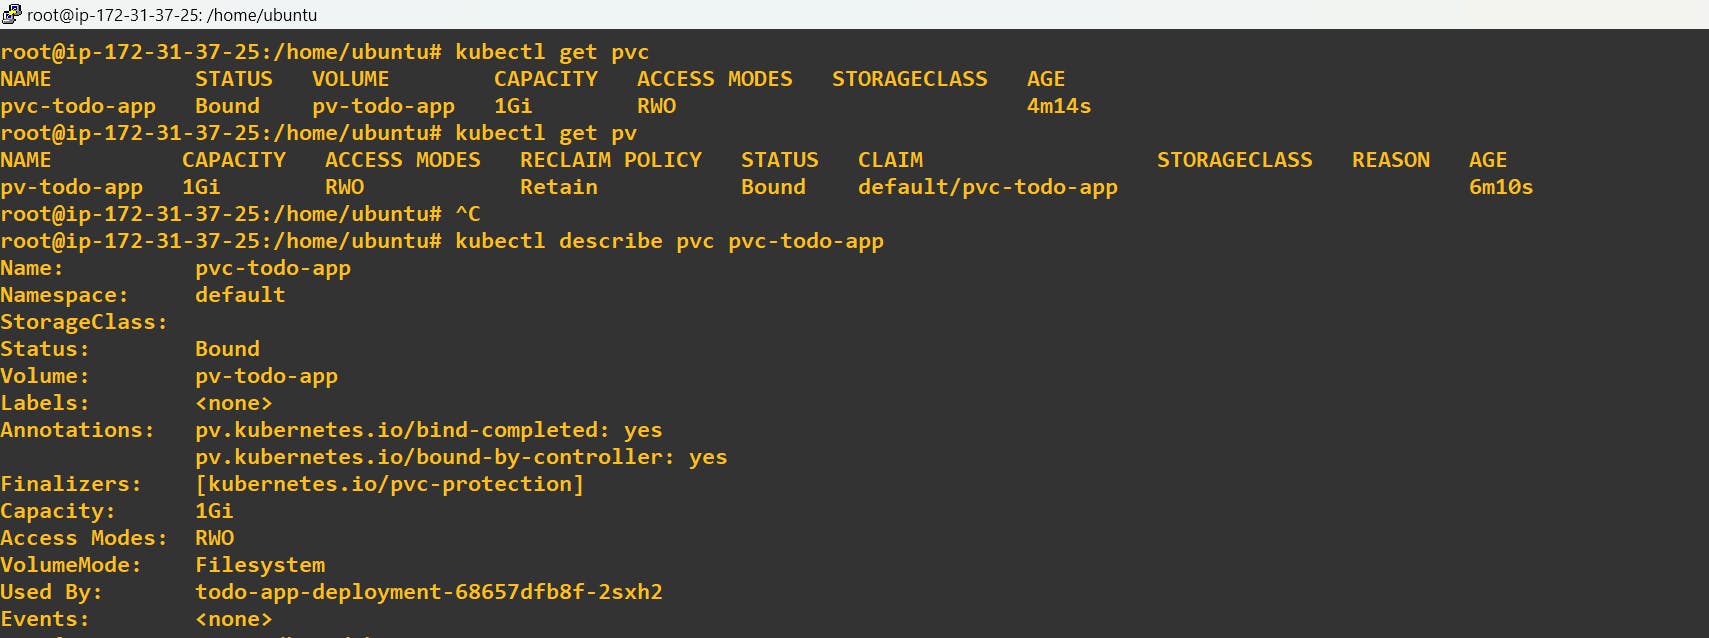
kubectl apply -f deployment.ymlVerify that the Persistent Volume has been added to your Deployment by checking the status of the Pods and Persistent Volumes in your cluster. Use this commands
kubectl get pods
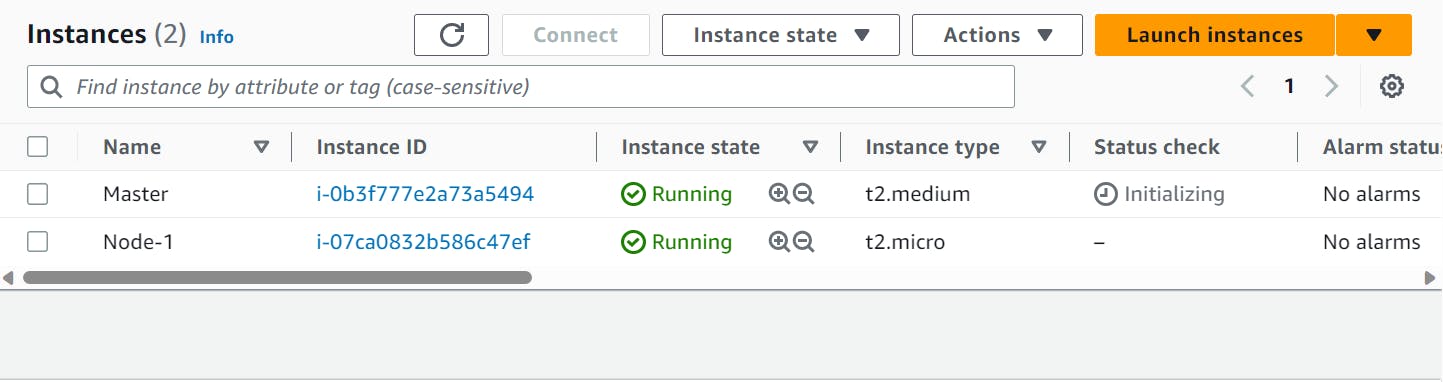
Step-1 Create two Instance in AWS Console :
Step-2 install Kubernetes in Both Node:
++++++++++MASTER+++++++++++ ++++++++NODE++++++++

Step-3 Add a Persistent Volume to your Deployment:
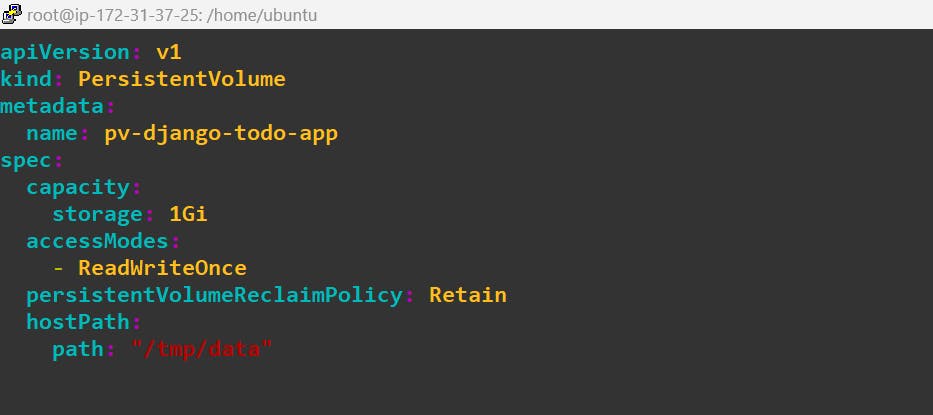
kubectl apply -f pv.yml
Step-4 Next, apply the pvc.yml file to create a Persistent Volume Claim that references the Persistent Volume using the following command:
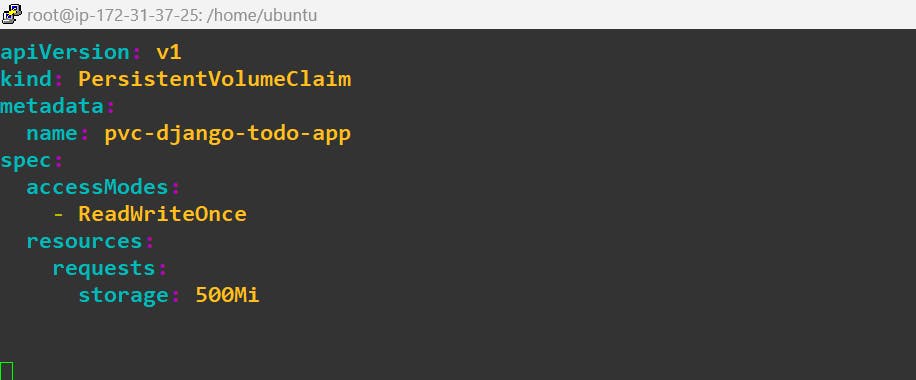
kubectl apply -f pvc.yml
Step-5 Finally, update your deployment.yml file to include the Persistent Volume Claim. Change the volumes and volumeMounts sections in your deployment.yml file.
Apply the updated deployment.yml file using the following command:
kubectl apply -f deployment.yml
Step-6 Verify that the Persistent Volume has been added to your Deployment by checking the status of the Pods and Persistent Volumes in your cluster:
Task 2:
Accessing data in the Persistent Volume,
Connect to a Pod in your Deployment using the command : `kubectl exec -it -- /bin/bash
Verify that you can access the data stored in the Persistent Volume from within the Pod
Step-7: Verify that you can access the data stored in the Persistent Volume from within the Pod by creating a file inside the /app directory using the following command:

Step-8 Now, delete that pod, by deleting the deployment and check if the file in the new pod is created after applying the deployment again in the server.


Now create a new Pod and verify the file you have created:
